
When babies transition from crawling to pulling themselves up, their world expands, and so does the potential for bumps and bruises. Sharp furniture corners at toddler eye level represent one of the most common household hazards for active infants. Installing baby corner protectors is a simple and highly effective way to cushion these impact zones, but a one-size-fits-all approach rarely works.
To choose the right corner protector, you must evaluate the specific furniture pieces in your home, noting their edge thicknesses, corner shapes, and surface materials. A protector that clings securely to a thick wooden dining table might slide right off a thin glass coffee table or ruin the delicate finish of an antique cabinet. By understanding how different materials, profiles, and adhesives interact with your household furniture, you can create a safer environment for your child while preserving the integrity of your home.
Assess Your Furniture Edges and Corner Shapes
Before purchasing any childproofing supplies, take a walk through your living spaces to audit your furniture. Grab a measuring tape and note the exact thickness of every exposed edge that sits within your child’s reach. Furniture edges generally fall into three categories: thin (under 1 centimeter), standard (1 to 2.5 centimeters), and thick (over 2.5 centimeters). Knowing these measurements prevents the common mistake of buying protectors that are too narrow to wrap around the edge or too wide to adhere properly.
Products mentioned in this guide
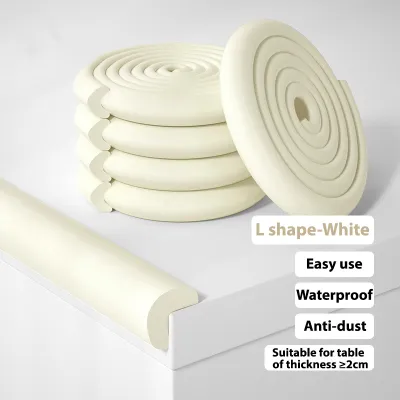
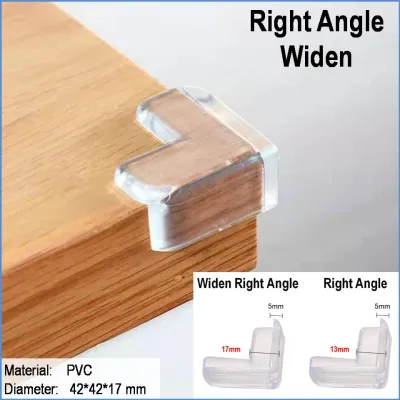
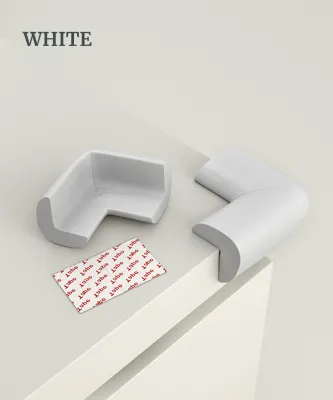
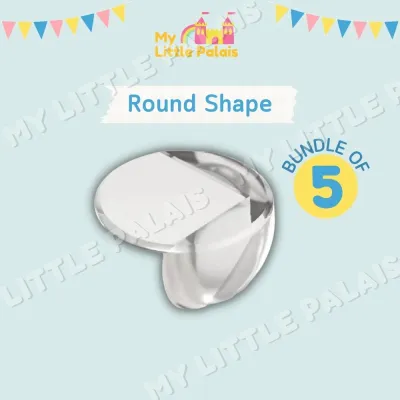
![[✅SG Ready Stock] Edge & Corner Guards 2 meter Baby Bumper Edge Strip Safety Corner Protector Edge kids children](https://img.lazcdn.com/g/p/7df2151c1b72eee4b4ed58ff07ab12ab.jpg_400x400q80.jpg_.webp)
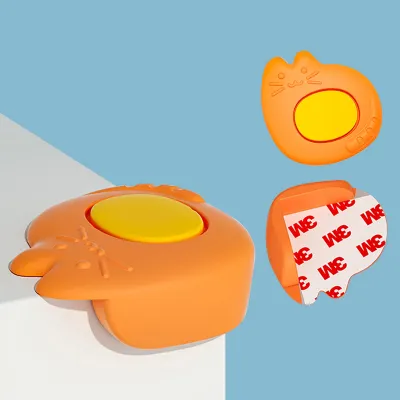
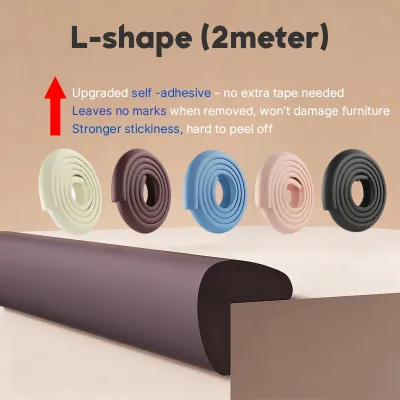
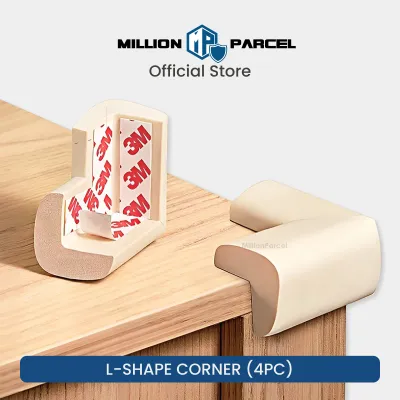
Prices are valid at publication and may change. Please refer to the product page for the latest price.
Next, examine the shape of the corners themselves. Standard 90-degree sharp corners are the most straightforward to protect, but many modern furniture pieces feature rounded, bevelled, or highly irregular edges. A rigid, pre-molded 90-degree corner guard will not sit flush on a rounded corner, leaving gaps that invite curious little fingers to pry the protector loose. For curved or irregular edges, flexible bumper strips that can be cut to size and bent around contours are far more effective.
The material of the furniture surface also dictates your choice of protection. Smooth, non-porous surfaces like glass, polished metal, and sealed wood offer excellent grip for standard adhesives. Conversely, textured wood, matte finishes, stone, and painted surfaces are more challenging because microscopic gaps in the material can prevent adhesives from forming a complete bond. Identifying these surface characteristics early helps you select the right adhesive strength and application method.
Finally, map out your home’s high-risk zones to prioritize your childproofing efforts. In compact living environments, such as modern apartments in Singapore, multi-functional furniture is common, and play areas often overlap with dining and working spaces. Low-profile coffee tables, TV consoles, low shelving units, and the sharp edges of dining tables are the most frequent culprits for toddler head injuries. Focus your initial efforts on these high-traffic zones where your baby is most likely to lose their balance while learning to stand and walk.
Match Protector Materials to Furniture Surfaces
Baby corner protectors are primarily made from clear plastics (like silicone or PVC) or high-density foam. Each material offers distinct advantages depending on where it is installed and the level of impact protection required. Clear silicone and PVC protectors are highly favored for modern, minimalist furniture because they are virtually transparent. They allow the natural beauty of wood grain, glass, or metal to show through, making them less visually disruptive in your living room.

Because clear protectors blend into the furniture, they are also less likely to attract the attention of a curious toddler. Babies are naturally drawn to bright colors and contrasting textures; a bright foam bumper on a dark wood table is an open invitation for a child to pull and chew on it. Clear silicone is also highly durable, water-resistant, and easy to wipe clean, making it an excellent choice for dining tables and kitchen countertops where food spills are frequent.
High-density foam protectors, often made from Nitrile Butadiene Rubber (NBR), offer superior impact absorption. The thick, spongy texture of foam provides a soft cushion that can absorb significant force, making it ideal for sharp, heavy edges like stone hearths or solid timber tables. Foam is also highly flexible, allowing you to wrap it around curved edges or cut it to custom lengths for long runs of shelving. However, foam is bulkier, highly visible, and can be damaged if a teething baby decides to bite it.
When matching materials, always consider the finish of your furniture. Delicate surfaces, such as unsealed wood, antique veneers, or cheaply laminated particle board, require extra caution. Strong adhesives can strip away finishes or leave permanent stains when the protectors are eventually removed. Check product labels carefully to ensure the protector and its accompanying adhesive are rated safe for your specific furniture material, and avoid using heavy-duty adhesives on irreplaceable family heirlooms.
Select the Right Size and Profile for Edge Thickness
The profile of a corner protector refers to its cross-sectional shape, which must match the thickness of your furniture edge to provide adequate coverage. The two most common profiles are L-shaped and U-shaped guards. L-shaped protectors cover the top flat surface and the vertical face of a 90-degree edge. They are highly versatile and work well on standard to thick tables, cabinet tops, and shelves where only the upper edge poses a hazard.
For thin surfaces, such as glass tabletops or metal shelving, U-shaped protectors are generally the best choice. A U-shaped guard wraps completely around the top, the edge, and the bottom of the surface, encasing the sharp boundary entirely. If you attempt to use a standard L-shaped guard on a thin glass pane, there is insufficient surface area on the vertical edge for the adhesive to grip, causing the protector to peel off quickly. Ensure the inner channel of the U-shaped guard matches the thickness of your glass to prevent sliding.
Standard and thick edges, such as solid wood dining tables or stone kitchen islands, require wider L-shaped guards or customizable bumper rolls. If a protector is too small for a thick edge, it will only cover a fraction of the sharp corner, leaving the lower portion exposed to impacts. Look for extra-wide profiles that extend at least 2 to 3 centimeters down each side of the corner to ensure complete coverage and a larger adhesive contact area.
Always verify the manufacturer’s specified thickness range before making a purchase. Many brands label their products as “universal,” but physical limitations apply to all materials. A protector designed for a standard 2-centimeter table will stretch and fail on a 5-centimeter countertop, while a guard meant for thick edges will look unsightly and peel easily on a thin shelf. Accurate measurements of your furniture’s vertical edge face will guide you to the correct product specifications.
Evaluate Adhesive Types and Surface Safety
The effectiveness of any baby corner protector relies heavily on the quality and type of adhesive used to secure it. Most commercial protectors come with double-sided acrylic tape, which offers a strong, clear bond that performs well on smooth surfaces. Acrylic tape is highly resistant to temperature fluctuations and humidity, which is particularly important in warm, humid climates like Singapore where standard glues can soften and fail over time.
Gel-based adhesive pads are another popular option, offering a thicker, more conformable layer of glue. Gel pads are excellent for slightly textured surfaces because the pliable gel flows into microscopic crevices, creating a stronger mechanical bond than thin tape. Some temporary protectors utilize suction cups, though these are generally limited to glass surfaces and are easily bypassed by determined toddlers, making them less reliable for long-term childproofing.
Before applying any adhesive to a prominent piece of furniture, it is crucial to perform a small, hidden adhesion test. Apply a small piece of the included tape to an inconspicuous area, such as the underside of the table or the back of a leg. Leave it in place for 24 to 48 hours, then remove it carefully to check if the adhesive lifts the paint, varnish, or wood grain. This simple step can save you from costly furniture restoration bills later on.
When shopping, look for products that explicitly claim “damage-free removal” or are designed for temporary home use. Avoid using industrial-strength glues, superglues, or heavy-duty construction adhesives to secure baby protectors. While these permanent glues will certainly keep the protectors in place, they will ruin your furniture upon removal and can release volatile organic compounds (VOCs) that are unsafe for indoor air quality around infants.
Step-by-Step Installation and Ongoing Maintenance
Proper installation is key to ensuring your corner protectors stay in place when tested by a curious child. Begin by cleaning the furniture surface thoroughly to remove dust, oils, fingerprints, and polish residue. Use rubbing alcohol on compatible surfaces, or mild soapy water for delicate finishes, and allow the area to dry completely. Any moisture or oil left on the surface will severely compromise the adhesive’s ability to bond.
Once the surface is clean and dry, measure and cut your protector strips to the required length if you are using customizable rolls. Peel the backing paper from the adhesive tape, taking care not to touch the sticky surface with your fingers, as skin oils reduce adhesion. Align the protector precisely with the corner or edge, then press down firmly along the entire length of the guard. Apply consistent, heavy pressure for at least 30 seconds to activate the pressure-sensitive adhesive.
After installation, allow the adhesive to cure fully before allowing your child near the furniture. Most high-quality adhesives require a full 24 hours to reach their maximum bonding strength. Introducing a curious baby to the protectors too early can result in them being pulled off immediately, ruining the adhesive and requiring you to start the process over with fresh tape.
Childproofing is not a set-and-forget task; ongoing maintenance is essential for continued safety. Babies will naturally pull, kick, and even chew on corner protectors as they explore their environment. Inspect all installed guards at least once a week to check for peeling corners, tears in foam, or bite marks. If a protector becomes loose, damaged, or partially detached, replace it immediately to prevent it from becoming a choking hazard or failing during an accidental fall.
Frequently Asked Questions (FAQ)
Can I use corner protectors on glass tables?
Yes, you can use corner protectors on glass tables, but you must select the correct type to ensure safety and stability. Opt for transparent silicone or PVC U-shaped protectors that wrap around both the top and bottom of the glass edge, providing a secure mechanical fit. Avoid using highly rigid plastic protectors or applying excessive force during installation, as uneven pressure can create stress points that might crack or chip tempered glass.
How do I remove adhesive residue without damaging wood?
To remove adhesive residue safely from wooden furniture, start by warming the adhesive with a hairdryer on a low-heat setting to soften the glue. Gently peel the protector back at a shallow angle, applying heat as you go. For any remaining sticky residue, apply a small amount of mild dish soap mixed with warm water, or a furniture-safe mineral oil, using a soft microfiber cloth to rub the spot gently. Avoid using sharp metal scrapers, steel wool, or harsh chemical solvents like acetone, which can permanently strip or discolor the wood’s protective finish.

Community discussion
Share your experience or ask a question. Comments are reviewed before publication.