
Choosing the right corner bumper is a critical step in transforming your living space into a secure environment as your child transitions from crawling to walking. During this developmental milestone, toddlers lack the coordination and spatial awareness to navigate sharp furniture corners safely. To select the most effective protection, parents must evaluate four primary pillars: material safety and impact absorption, adhesive reliability, size and shape compatibility, and verifiable safety certifications. By balancing these criteria, you can mitigate the risk of impact injuries while preserving the structural integrity of your furniture.
While installing corner guards significantly reduces the severity of accidental bumps, it is vital to establish a realistic safety boundary early in your baby-proofing journey. Corner bumpers are designed as secondary mitigation tools; they do not replace active adult supervision or a comprehensive home safety strategy. No physical barrier can completely eliminate the risks associated with a child’s rapid physical development and natural curiosity. Therefore, selecting high-quality materials and maintaining them diligently should always be paired with vigilant caregiving.
Matching Bumper Materials to Your Furniture and Baby's Stage
Selecting the right material for your corner bumpers requires an understanding of how different substances absorb kinetic energy and how they interact with your child’s developmental stages. The most common materials available include high-density foam (often Nitrile Butadiene Rubber or NBR), silicone, polyvinyl chloride (PVC), and thermoplastic polyurethane (TPU). High-density foam is exceptionally soft and compresses easily, making it highly effective at absorbing high-velocity impacts when a toddler falls. However, its porous nature makes it highly susceptible to wear, and it can be easily damaged by curious fingers or household pets.
Products mentioned in this guide
![[SG Stock] Corner Protector❤️Table Furniture Sharp Edge Safety Guard Silicone Bumper Baby Kids Children Protection](https://img.lazcdn.com/g/p/774cbe2a2c03816c7a70d8c8c65de91c.jpg_400x400q80.jpg_.webp)
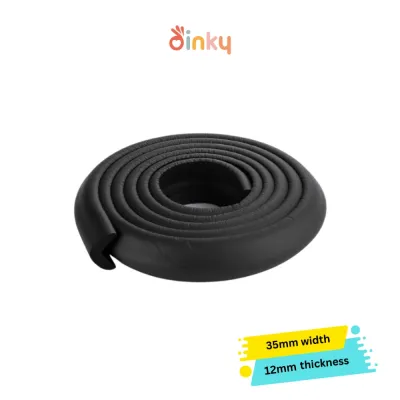
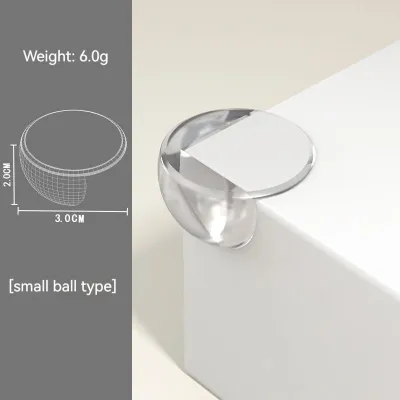
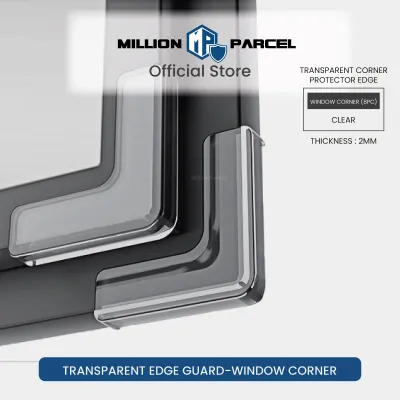
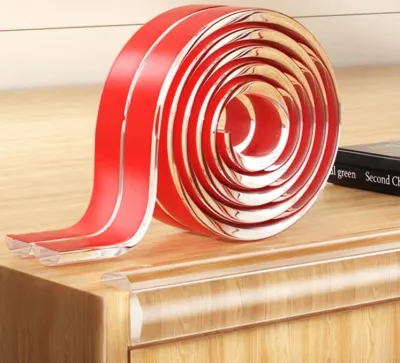
![[SG] Transparent Corner Protector | Corner Guard Baby Safety Corner Protector for Table & Furniture Corner Edge Bumper](https://img.lazcdn.com/g/p/2c50bffc2ff9a577f539ca8b522b78f3.jpg_400x400q80.jpg_.webp)
![[SG] Baby Corner Guard | Corner Protector | Baby Head Protector | Edge Protector | Bumper Protector | Table Corner P](https://img.lazcdn.com/g/p/639dc659f4ac09136444894423441c9f.jpg_400x400q80.jpg_.webp)
Prices are valid at publication and may change. Please refer to the product page for the latest price.
Silicone and PVC offer a different set of physical properties, characterized by durability and a lower visual profile. Clear silicone bumpers are highly favored for modern interiors because they allow the natural wood grain or glass edge of your furniture to remain visible. While silicone is firmer than foam, it excels at dispersing localized force across a wider surface area, preventing deep puncture injuries from sharp edges. PVC is similarly durable and highly resistant to compression, but it lacks the tactile softness of foam and silicone, making it better suited for low-traffic areas or firmer furniture pieces.
During the teething and oral exploration phase, infants naturally use their mouths to explore their surroundings, and corner bumpers at eye level are prime targets for chewing. Because of this behavior, you must never assume a material is safe simply because it is marketed for children. Always inspect the product packaging and manufacturer documentation to verify explicit compliance claims such as “BPA-free,” “phthalate-free,” “lead-free,” and “non-toxic.” These chemical classifications prevent your child from ingesting harmful plasticizers or heavy metals if they chew on the guards.
Tear resistance is another crucial safety factor directly linked to the choking hazards of degraded materials. If a baby-proofing bumper tears easily, a teething child can bite off small chunks of foam or soft plastic, creating an immediate airway obstruction. High-density foam guards should feature a reinforced skin or a high tensile strength rating to prevent tearing under pressure. Silicone and TPU are naturally highly resistant to tearing, making them excellent choices for children who are actively teething.
Finally, you must match the physical flexibility of the material to the contours of your furniture. Rigid, pre-molded plastic or firm silicone guards are ideal for clean, 90-degree corners on square tables, but they will fail to adhere to rounded or irregular edges. Highly flexible foam or soft rubber strips can be bent and molded to follow curved coffee tables, organic furniture profiles, or custom cabinetry. Regardless of the material you choose, establish a routine to inspect the physical state of the bumpers weekly, looking for signs of cracking, crumbling, or bite marks that indicate it is time for a replacement.
Evaluating Adhesive Strength and Surface Compatibility
The protective value of any corner bumper is entirely dependent on the strength and longevity of its adhesive. If a guard peels away easily, it not only fails to protect your child from sharp edges but also becomes a dangerous choking hazard itself. Double-sided acrylic tape is the industry standard for baby-proofing, offering a high initial tack and a strong permanent bond that resists lateral pulling forces. Silicone gel pads provide a thicker, semi-flexible adhesive layer that conforms well to textured surfaces, while suction-based attachments are generally unsuitable for permanent baby-proofing due to their high failure rate.

Adhesives behave differently depending on the material and finish of the underlying furniture. Non-porous surfaces like tempered glass, metal, and polished laminate provide excellent contact points for acrylic adhesives, allowing for a tight, secure bond. Conversely, porous materials like unsealed wood, rustic pine, or textured stone absorb the liquid components of adhesives, which can weaken the bond over time or make eventual removal highly difficult. Painted surfaces and drywall are particularly vulnerable, as strong adhesives can easily pull the paint or paper backing away from the substrate during removal.
Before applying any adhesive product to your furniture, it is essential to check the manufacturer’s care instructions and warranty guidelines. High-end wood finishes, delicate veneers, French polishes, and oil-rubbed surfaces can be permanently altered, discolored, or stripped by the chemical solvents present in commercial adhesives. Applying tape to these surfaces may void your furniture warranty or lead to costly restoration expenses later on.
To prevent widespread damage to your home’s interior, always perform a hidden spot test with the adhesive before proceeding with a full installation. Apply a small, half-inch piece of the adhesive tape to an inconspicuous area of the furniture, such as the underside of a table leg, the back panel of a console, or the inside edge of a frame. Leave the test piece in place for 24 to 48 hours to assess how the adhesive reacts with the finish. When you peel it off, inspect the area closely for any signs of discoloration, finish lifting, bubbling, or chemical softening.
Sizing, Shape, and Coverage for Different Furniture Types
Achieving comprehensive protection throughout your home requires selecting the correct dimensions and shapes of bumpers to match your specific furniture layouts. A mismatch in sizing can leave dangerous gaps or create catch points that allow toddlers to pull the guards loose.
Corner Guards vs. Edge Bumpers
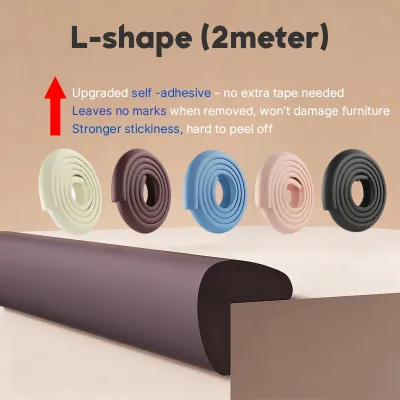
It is important to distinguish between corner guards and continuous edge bumpers, as they serve different structural purposes. Corner guards are pre-formed, three-dimensional caps—typically L-shaped or spherical—designed specifically to cover the sharp, three-sided intersection where the top and sides of a piece of furniture meet. Edge bumpers, on the other hand, are long, flexible strips sold in rolls that are designed to run along the flat, linear borders of tables, shelves, or countertops.
For comprehensive protection, you will often need to combine both product types on a single piece of furniture. For example, a rectangular wooden coffee table features both razor-sharp corner points and long, hard edges that can cause severe bruising if a child falls sideways against them. In this scenario, installing spherical corner guards on the four corners and running continuous foam edge bumpers along the perimeter ensures that the entire impact zone is thoroughly padded.
Measuring and Calculating Coverage
To determine how much material to purchase, begin by measuring all exposed furniture edges that fall within your child’s reach. This typical hazard zone extends from floor level up to approximately one meter high, encompassing coffee tables, TV consoles, low bookshelves, and bedside tables. Use a flexible measuring tape to record the linear length of each edge, summing the totals to calculate the required length of continuous edge bumpers.
When evaluating dimensions, do not focus solely on the linear length; the thickness and width of the bumper are equally critical. A corner bumper must be wide enough to wrap completely over the top, face, and bottom of the edge to cover the entire potential impact zone. If your dining table has a thick, beveled edge of three centimeters, a thin, low-profile guard will leave the lower corner exposed. Ensure the inner dimensions of the bumper match or slightly exceed the thickness of the furniture edge.
Always purchase approximately 10% to 15% more material than your raw measurements indicate. This surplus accounts for potential cutting errors, the creation of custom miter joints at corners, and future furniture rearrangements. Having extra material on hand also allows you to quickly replace individual sections that may become damaged or soiled over time without needing to wait for a new shipment.
Safety Standards, Certifications, and Pre-Purchase Checks
When shopping for baby-proofing products, you will encounter a wide array of options on online marketplaces and specialty retail stores. To protect your child from substandard materials, you must look past generic marketing claims and focus on verifiable safety standards. Terms like “baby-safe,” “eco-friendly,” or “pediatrician-approved” carry no legal weight and are often used without independent verification.
Instead, look for recognized international and local safety certifications printed directly on the product packaging or verified in the manufacturer’s official documentation. Key standards to verify include:
- ASTM F963: The standard consumer safety specification for toy safety, which ensures the product is free from hazardous chemicals, heavy metals, and mechanical defects.
- EN 71: The European standard for safety requirements for toys, specifically Part 3, which restricts the migration of certain chemical elements from materials.
- CPSIA: The Consumer Product Safety Improvement Act, which strictly limits lead and phthalates in children's products.
- Enterprise Singapore Guidelines: Local consumer product safety requirements that monitor the safety of general consumer goods sold in Singapore.
If a manufacturer cannot provide a copy of a third-party laboratory test report (such as those from SGS, TÜV SÜD, or Intertek) confirming compliance with these standards, it is best to choose an alternative product. This is particularly important in Singapore’s warm, humid climate, where chemical off-gassing and material degradation can be accelerated if low-grade plastics or uncertified adhesives are used.
Additionally, inspect the physical design of the corner bumper for potential choking hazards before purchasing. Avoid designs that feature small, detachable decorative elements, multi-piece assemblies, or cartoon shapes that can be easily pried apart by an inquisitive toddler. A solid, single-piece construction is always the safest choice. Finally, read user reviews with a specific focus on long-term performance; look for patterns of early adhesive failure, material yellowing, or rapid tearing, which offer a more realistic picture of the product’s durability than initial installation ratings.
Installation, Maintenance, and Safe Removal
Proper installation technique and regular maintenance are just as important as choosing the right product. Even the highest-rated corner bumper will fail if the surface is not prepared correctly or if the adhesive is not allowed to cure properly.
Surface Preparation and Application
To ensure maximum adhesive performance, start by cleaning the application surface thoroughly. Dust, skin oils, furniture polish, and wax residues will prevent the adhesive from forming a strong molecular bond with the furniture. Wipe the area down using a clean microfiber cloth dampened with a mild, non-residue cleaner, such as isopropyl rubbing alcohol mixed with water, provided it is safe for your specific furniture finish. Avoid using heavy household detergents or oil-based wood cleaners, which leave behind slick residues.
Allow the surface to dry completely before attempting to apply the adhesive. Any moisture trapped beneath the tape will compromise the bond and can lead to mold growth or wood rot over time. Once dry, peel the backing from the adhesive tape, align the bumper precisely with the corner, and press it firmly into place. Apply strong, even pressure along the entire length of the guard for at least 30 to 60 seconds to activate the pressure-sensitive adhesive.
After application, allow the adhesive to cure undisturbed for the manufacturer’s recommended time frame—typically 24 hours. Keep your child away from the newly treated furniture during this curing window, as any early tugging or shifting will permanently weaken the bond. To maintain safety, establish a weekly maintenance check where you gently tug on each corner bumper. If you notice any lifting, peeling, or loose edges, remove the guard immediately and reapply it with fresh adhesive to prevent it from becoming a choking hazard.
Damage-Free Removal Techniques
When your child outgrows the need for corner bumpers, removing them without ruining your furniture finishes requires patience and the correct technique. Never attempt to rip or yank a bonded bumper straight off the wood, glass, or painted surface, as this sudden force is highly likely to tear wood fibers, lift delicate veneers, or peel away paint layers.
To remove a bumper safely, use a hairdryer set to a low or medium heat setting to gently warm the adhesive underneath. Hold the dryer a few centimeters away from the guard and sweep it back and forth to distribute the heat evenly. The warmth will soften the acrylic or gel adhesive, reducing its bond strength and allowing you to slowly peel the bumper away from the surface. For thick foam or gel guards, you can also slide a piece of dental floss or thin nylon fishing line between the bumper and the furniture, using a gentle sawing motion to slice through the softened adhesive layer.
Once the bumper is removed, clean up any remaining sticky residue using a mild, furniture-safe adhesive remover, a drop of vegetable oil, or a specialized citrus-based cleaner. Always cross-reference the chemical remover’s instructions with your furniture manufacturer’s care guidelines to ensure it will not strip the finish. If your furniture has a highly delicate antique finish, a hand-rubbed oil glaze, or an unknown custom veneer, and the adhesive resists gentle heat or floss, stop immediately. In these delicate scenarios, consult a qualified furniture restoration professional rather than forcing the removal and causing irreversible structural or aesthetic damage to your valued pieces.

Community discussion
Share your experience or ask a question. Comments are reviewed before publication.