
Choosing a fork for kids requires matching the utensil’s physical features—such as handle thickness, shaft length, and tine design—to your child’s developmental stage and motor skills. From the early palmar grasp of infancy to the refined tripod grasp of preschool years, the right fork supports self-feeding progress while keeping mealtime manageable and safe. By understanding what features to look for at each stage, you can select utensils that encourage independence and build confidence at the family dinner table.
Fork Features for Babies and Early Weaning (6–12 Months)
Around 6 to 12 months, babies are exploring textures and developing basic hand-to-mouth coordination. They typically use a palmar grasp, wrapping their entire fist around an object rather than using individual fingers. Utensils designed for this stage serve more as tools for exploration and sensory play than for efficient eating.
To accommodate this fist-like grip, look for forks with thick, bulbous, or textured handles. These chunky shapes give tiny hands more surface area to hold, reducing frustration when trying to lift the utensil. Handles made of textured silicone or with raised ridges can also prevent the fork from slipping out of wet or food-covered hands.
Products mentioned in this guide



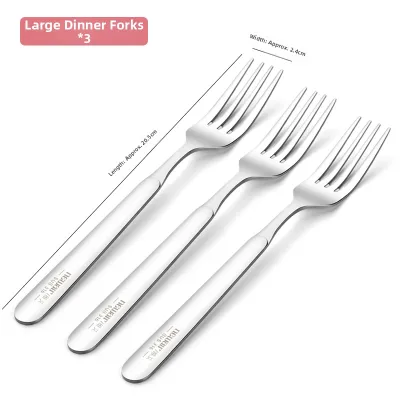

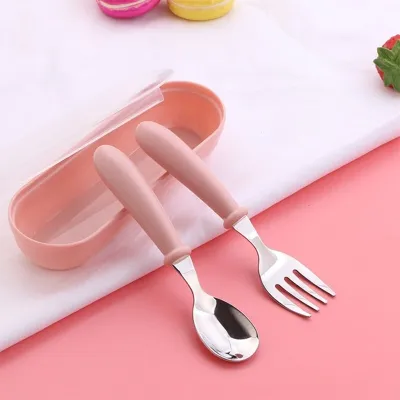
Prices are valid at publication and may change. Please refer to the product page for the latest price.
At this stage, the primary purpose of a fork is often dipping or grabbing soft, mashed foods rather than piercing. Look for blunt, rounded, or flexible tines made of soft materials like food-grade silicone to protect sensitive, teething gums and emerging baby teeth. Rigid or sharp tines can cause discomfort if a baby accidentally jabs their mouth.
A short overall shaft length is crucial for preventing the fork from going too far into the mouth. Many early weaning forks feature a built-in collar or choke-guard shield that physically limits how deep the utensil can be inserted, providing an extra layer of reassurance during self-feeding practice. Caregivers must always supervise babies closely during meals, regardless of the fork’s design, to ensure safe exploration.
Fork Features for Toddlers Mastering Self-Feeding (1–3 Years)
Between 1 and 3 years, toddlers begin transitioning from a full-fist grip to a more controlled finger-driven grasp, such as a digital grasp or an early tripod grasp. Their hand-eye coordination improves, allowing them to actively aim for food on their plates. The right fork at this stage supports this transition by offering more control and functionality.

Look for handles that are slightly contoured, textured, or even subtly angled. An angled handle can help guide food toward the mouth with less wrist rotation, which is highly beneficial as toddlers refine their motor planning. Ergonomic grips with designated finger placement zones can also encourage the transition toward a mature pencil-like hold.
The shaft of the fork should be slightly longer than an infant fork to help the child reach into deeper bowls, yet still short and stubby enough to prevent the utensil from wobbling out of control. A long, adult-sized shaft is difficult for a toddler to balance and can lead to spills. A balanced weight distribution between the handle and the head helps the toddler maintain control.
Toddlers need tines that can pierce soft foods like cooked pasta, steamed vegetables, or soft fruit pieces. Look for tines that are firm enough to hold food but still feature rounded tips rather than sharp points. Many toddler forks use a combination of a sturdy plastic or nylon core covered with a softer outer layer, or rounded stainless steel tines with blunt edges. Always verify the manufacturer’s age recommendations on the packaging to ensure the materials match your child’s current stage.
Fork Features for Preschoolers and Older Children (3+ Years)
By age three and older, children have usually developed a mature tripod grasp, similar to how they hold a pencil. They are eating a wider variety of family meals, including firmer meats and raw vegetables, which require more force to pierce. Their utensils should reflect this increased strength and coordination.
Look for forks with longer, slimmer handles that approach adult proportions but are scaled down to fit a child’s palm. These longer handles provide the leverage needed to press down on firmer foods without bending. Ergonomic shapes remain helpful, but children at this stage can typically manage straight, classic handle designs.
The tines on preschooler forks are more defined and closely resemble adult forks, allowing for efficient piercing. However, they should still feature smoothed, deburred edges to prevent accidental scratches to the lips or tongue. Avoid forks with sharp, needle-like tips, as children are still refining their speed and control during meals.
This stage is ideal for transitioning to stainless steel utensils. Metal forks provide the necessary rigidity for piercing firmer foods, and their slight weight helps children learn to balance the utensil properly. Look for options with comfortable plastic, silicone, or smoothed metal handles that offer a balanced weight distribution. Ensure you check the product labels for any specific safety standards or material certifications before purchasing.
Essential Safety Checks and Care Instructions
Before every meal, perform a quick visual and tactile check of your child’s fork. Run your fingers over the tines and handle to check for cracks, rough edges, loose parts, or peeling material, which can pose choking hazards or harbor bacteria. If the fork has a multi-piece construction, ensure the head is securely attached to the handle.
Always follow the manufacturer’s specific instructions for cleaning and sterilization. While some silicone and metal forks are dishwasher-safe, others with composite handles or specific plastic components may degrade quickly under high heat or in steam sterilizers. Using the wrong cleaning method can compromise the structural integrity of the utensil.
Establish a clear rule for retiring utensils. If you notice any signs of material degradation—such as sticky silicone, deep scratches that cannot be thoroughly cleaned, bent metal tines, or loose joints between the handle and the head—discard the fork immediately and replace it. If your child shows signs of discomfort or if you have concerns about their feeding development, consult a pediatrician or a pediatric occupational therapist for personalized guidance.
Frequently Asked Questions (FAQ)
At what age should a child transition from a silicone fork to a metal one?
The transition from silicone to metal typically occurs around 18 to 24 months, but it depends heavily on your child’s individual dexterity and chewing habits. Look for signs that your child can consistently guide a utensil to their mouth without poking themselves and has stopped aggressively biting down on the fork head. Always check the manufacturer’s age recommendations and safety warnings on the packaging before introducing a metal utensil, as some designs are intended for older age groups.
How can I tell if a fork handle is the right size for my toddler's hand?
Observe your toddler during mealtime to evaluate the fit. If the handle is too small or thin, you may notice their fingers slipping off the grip, or they might struggle to apply enough pressure to pierce food. If the handle is too long or heavy, the fork may tilt backward out of their hand. A well-sized fork allows your toddler’s hand to wrap comfortably around the grip with their wrist remaining in a natural, neutral position while scooping or piercing.
Community discussion
Share your experience or ask a question. Comments are reviewed before publication.