
Finding a compatible replacement straw for your baby’s weaning cup is essential to maintain a leak-proof seal, ensure proper hygiene, and support safe drinking. A mismatched straw can lead to frustrating leaks, restricted liquid flow, or even choking hazards if the straw detaches during use. To determine if a replacement straw fits, you must first identify the exact make and model of your weaning cup, measure the physical dimensions of the original straw, and verify that the replacement matches the cup’s specific valve and sealing mechanisms. Taking these steps ensures your child can continue using their favorite cup comfortably and safely.
During the weaning phase, babies develop oral motor skills by transitioning from bottles to cups. The straw in a weaning cup is designed to support this developmental milestone by encouraging proper tongue positioning and swallowing patterns. However, because silicone straws are frequently chewed on or subjected to rigorous cleaning, they wear out over time and require regular replacement. Buying a generic replacement without verifying compatibility often results in a poor fit, which can disrupt your baby’s feeding routine and cause unnecessary spills.
Identify Your Cup's Make and Model for Official Replacements
The most reliable way to find a compatible replacement straw is to identify the exact brand and model of your baby’s weaning cup. Manufacturers design their cups with proprietary specifications, meaning a straw from one brand is highly unlikely to fit a cup from another. To begin, inspect the exterior of the cup thoroughly. The brand name is typically printed on the front or side of the cup, while the specific model name, volume capacity, and batch number are often molded into the plastic on the very bottom of the cup base.
Products mentioned in this guide
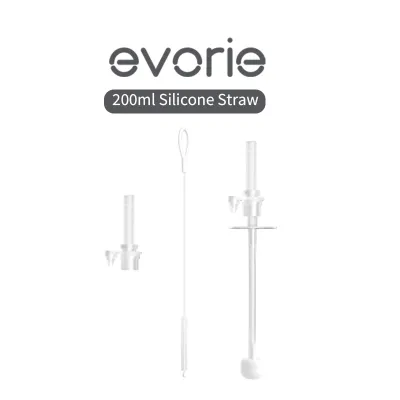
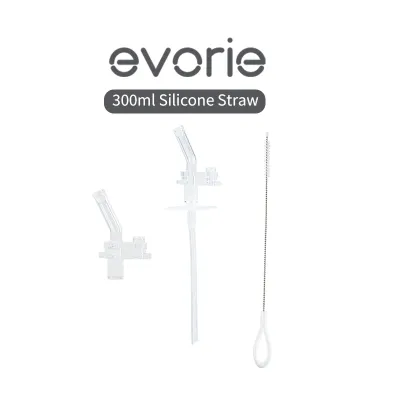
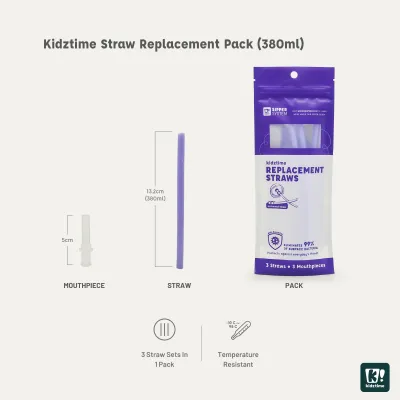
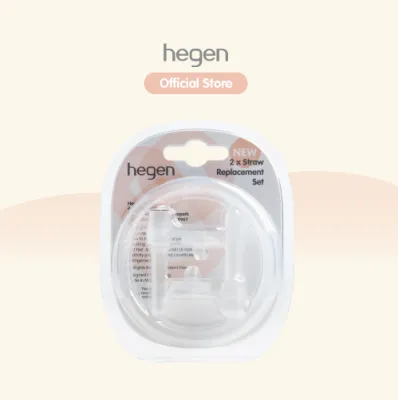
Prices are valid at publication and may change. Please refer to the product page for the latest price.
If the information on the cup has faded from repeated washing, refer to the original packaging or the user manual if you still have them. Many parents find it helpful to keep digital copies of manuals or take photos of product boxes for future reference. If you cannot find any physical markings, you can compare your cup’s visual design, lid mechanism, and handle shape with product listings on the manufacturer’s official website or authorized online marketplaces to confirm the exact model.
Understanding the category of your weaning cup is also crucial because different designs require entirely different straw systems. For instance, a weighted straw cup uses a flexible silicone tube attached to a heavy anchor at the bottom, allowing your baby to drink from any angle, even when tilted. In contrast, a standard straw cup relies on a straight, rigid, or semi-rigid tube that only reaches the bottom of the cup in an upright position. Knowing whether your cup uses a weighted ball system, a simple straight straw, or a specialized anti-colic valve will narrow down your search immediately.
Once you have identified the exact model, visit the brand’s official website or authorized local distributors to check for official replacement parts. Buying directly from the manufacturer or an authorized retailer guarantees that the replacement straw will fit perfectly and maintain the cup’s original leak-proof performance. If official replacements are temporarily out of stock, having the exact model name will allow you to search for third-party options that explicitly list your cup model as compatible.
Measure the Existing Straw for Exact Dimensions
When official replacement straws are unavailable, or if you are considering a third-party alternative, you must physically measure your existing straw to find an accurate match. Even minor differences of a single millimeter can prevent the straw from fitting through the lid or cause liquid to bypass the straw entirely. To get precise measurements, use a standard ruler or, for the most accurate results, a pair of digital calipers.

Start by measuring the outer diameter (OD) of the straw. This is the distance across the outside edges of the straw’s tube. The outer diameter must match the opening in the cup’s lid exactly. If the replacement straw’s outer diameter is too large, you will not be able to pull it through the lid opening without damaging the silicone. If it is too small, a gap will remain around the straw, leading to persistent leaks whenever the cup is tilted or dropped.
Next, measure the inner diameter (ID), which is the width of the hollow opening inside the straw. The inner diameter determines the flow rate of the liquid and how the straw connects to any internal parts, such as a weighted ball connector or an internal valve. A straw with an incorrect inner diameter may not secure tightly to these internal connectors, causing the straw to fall off inside the cup during use.
You must also measure the total length of the straw. For straight straws, measure from the very top tip to the bottom end. The straw needs to be long enough to reach the bottom of the cup so your baby can drink the last remaining drops of liquid, but not so long that it bends excessively or blocks the lid from screwing on tightly. If a replacement straw is too long but otherwise fits perfectly, you can sometimes trim it to the correct length using clean, sharp kitchen shears, provided the straw does not have a molded valve or weighted attachment at the bottom.
Finally, take note of any unique structural features on the original straw. Some straws feature a bent upper section to make drinking easier for younger babies, while others have a molded collar or flange near the top that locks the straw into place against the underside of the lid. If your original straw has these specialized shapes, a simple straight silicone tube will not function as a proper replacement.
Verify the Seal and Valve Mechanism to Prevent Leaks
A weaning cup’s ability to prevent leaks relies heavily on the interaction between the straw and the lid’s sealing system. Many modern weaning cups feature a built-in silicone sealing ring or gasket that sits inside the lid to create an airtight seal. When checking a replacement straw, verify whether the straw is integrated with this gasket as a single molded piece, or if it is a separate component that must be threaded through the gasket. If your cup uses a one-piece straw and gasket design, you must replace the entire assembly rather than just the straw tube.
Another critical component to inspect is the bite valve or anti-leak mechanism. Many baby weaning cups use a cross-slit or V-shaped valve at the top of the straw. This valve remains closed when the cup is not in use, preventing liquid from spilling out if the cup is tipped over or shaken. When the baby bites down gently on the straw, the valve opens to allow liquid to flow. If you purchase a replacement straw that lacks this valve, the cup will lose its spill-proof capability, which can lead to messy cleanups.
Weighted ball straws present unique compatibility challenges. The weighted ball at the bottom of the straw must be heavy enough to pull the flexible tube down into the liquid as the cup tilts, but the connection point must be completely secure. If the replacement straw’s material is too soft or the connection nozzle is slightly too small, the weighted ball can detach, posing a potential choking hazard. Always ensure that any replacement straw intended for a weighted cup is specifically designed to hold the weight securely.
Additionally, check how the straw aligns with the cup’s flip-top or sliding lid cover. Many weaning cups feature a lid that folds the straw down to seal it when not in use. The replacement straw must be flexible enough to bend easily under the lid without creasing or cracking. If the replacement material is too rigid, the lid will not close properly, or the straw may develop a permanent crease that restricts liquid flow even when the lid is open.
Evaluate Material Safety and Cleaning Requirements
When selecting any feeding accessory for your baby, material safety is the highest priority. Replacement straws must be made from high-quality, food-grade materials that are completely free from harmful chemicals. Look for product labels that explicitly state the materials used, such as food-grade silicone, polypropylene (PP), or copolyester (Tritan). Avoid purchasing unbranded or cheap replacement straws from unverified online sources that do not clearly list their material composition.
Silicone is the most common material for weaning cup straws because it is soft, flexible, and gentle on a baby’s sensitive gums and developing teeth. However, not all silicone is created equal. High-quality, platinum-cured silicone is preferred for baby products because it does not leach chemicals and is highly resistant to tearing. You can perform a simple check by pinching and twisting a section of the silicone; if the material turns white at the bend, it may contain cheap fillers rather than pure food-grade silicone.
You must also verify the manufacturer’s cleaning and sterilization instructions for the replacement straw. Babies have developing immune systems, making thorough sanitation essential. Check the heat resistance limits of the replacement straw to ensure it can withstand your preferred sterilization method, whether that is boiling water, a steam sterilizer, or a UV sterilizer. Some lower-quality plastics or silicone blends can warp, melt, or degrade when exposed to high temperatures, rendering them unusable and unsafe.
Inspect the physical design of the straw’s interior to ensure it can be cleaned effectively. The inside of a weaning cup straw is a prime breeding ground for mold and bacteria if liquid residue is left behind. A compatible replacement straw should have a smooth inner bore that allows a standard straw cleaning brush to pass through easily. Avoid straws with complex internal ridges or inaccessible chambers that cannot be reached with a brush, as these areas are nearly impossible to sanitize thoroughly.
Test the Fit, Seal, and Flow Rate Before Use
Before handing the reassembled weaning cup to your baby, you must perform a series of safety and functional tests. Start by assembling the cup with the new replacement straw, ensuring that all parts are seated tightly in their designated slots. Gently tug on the straw from the top of the lid to confirm that it is locked in place and will not pull through or slip down when your baby drinks from it.
Next, conduct a clear water leak test. Fill the cup with clean, room-temperature water and secure the lid firmly. Invert the cup completely over a sink and shake it gently. Observe the area around the base of the straw and the edges of the lid. If water drips or streams out, the straw is either the wrong size, improperly installed, or lacks the necessary sealing gasket. Do not use the cup for milk or juice if it fails this basic water test, as this will result in spills and potential stains.
After verifying the seal, test the liquid flow rate. You can do this by squeezing the bite valve or drawing water through the straw yourself using a clean syringe or by taking a small sip. The flow rate should be consistent and require a reasonable amount of suction. If the water flows too quickly or without any resistance, the straw’s inner diameter or valve opening may be too large for your baby’s developmental stage, which can lead to coughing or choking. Conversely, if it is too difficult to draw water, your baby may become frustrated and refuse to use the cup.
Establish clear stop-use conditions to ensure your baby’s safety over time. Inspect the replacement straw before every single use. If you notice any signs of persistent leaking, abnormal liquid flow, material deformation, cracking, or if your baby suddenly struggles or refuses to drink from the cup, stop using the replacement straw immediately. Keep in mind that if you are ever unsure about the safety, fit, or material integrity of a replacement part, it is best to contact the cup’s manufacturer directly or consult a pediatric feeding specialist for guidance.
Frequently Asked Questions (FAQ)
Can I use a generic straw if the original brand is out of stock?
While generic or universal replacement straws are widely available on various ecommerce platforms, using them carries risks. If you must use a generic straw, you must carefully verify that its outer diameter, inner diameter, length, and sealing mechanism match your original straw exactly. Even a tiny mismatch can cause the cup to leak or prevent the straw from staying secure. Whenever possible, prioritize official replacement parts from the original manufacturer, or choose third-party products that explicitly state they are compatible with your specific cup model.
How often should I replace my baby's cup straws?
You should inspect your baby’s weaning cup straws daily for signs of wear and tear. Replace the straw immediately if you observe visible bite marks, tears, discoloration, persistent mold spots that cannot be cleaned, or a change in the liquid flow rate. Because silicone is a soft material that degrades over time with frequent washing and sterilization, many manufacturers recommend replacing the straw every two to three months as a general hygiene practice, even if there is no visible damage. Always prioritize the physical condition of the straw over a fixed calendar timeline.
Community discussion
Share your experience or ask a question. Comments are reviewed before publication.