
Expressing breast milk comfortably and efficiently requires a combination of correct equipment setup, proper physical alignment, and customized pump settings. The Spectra S1 Pro is a popular double electric breast pump designed to mimic a baby’s natural nursing rhythm. To get the most out of your pumping sessions, you must understand how to assemble its closed-system components, select the correct flange size, and navigate its dual-phase settings. Taking a systematic approach to your pumping routine not only helps maintain your milk supply but also protects sensitive breast tissue from friction and excessive vacuum pressure.
Preparing Your Pump and Workspace
Before you begin any pumping session, cleanliness and organization are your top priorities. Wash your hands thoroughly with soap and water for at least 20 seconds. Gather all your sterilized pump parts, including the breast shields (flanges), silicone duckbill valves, backflow protectors, tubing, and collection bottles. In Singapore’s warm and humid climate, moisture can easily linger on freshly washed plastic and silicone parts. Ensure every single component is completely dry before assembly, as residual water can compromise the pump’s suction or find its way into areas where it might encourage mold growth.
Consult the manufacturer’s manual to verify the exact assembly sequence. The backflow protector is a critical closed-system component consisting of a silicone membrane sandwiched between two plastic casings. This protector must be assembled tightly and attached directly to the breast shield before you connect the tubing. The tubing itself should remain dry and connects the backflow protector to the main pump motor. Ensuring these connections are airtight prevents milk from entering the tubing or the motor unit, preserving the hygiene of your milk and the longevity of your device.
Products mentioned in this guide
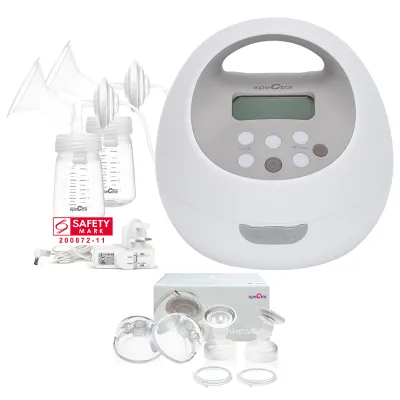
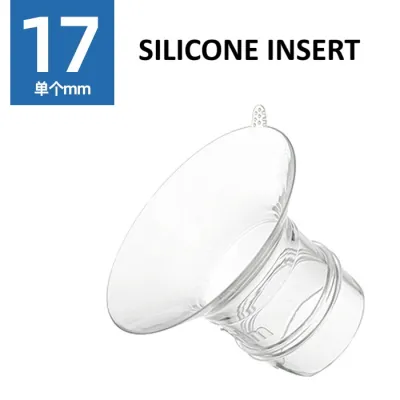
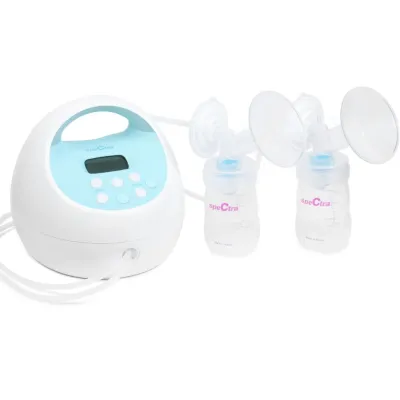

Prices are valid at publication and may change. Please refer to the product page for the latest price.
Creating a dedicated, comfortable pumping station can significantly improve your overall experience. Choose a supportive chair that allows you to sit upright without straining your back or shoulders. Keep a large bottle of water and a healthy snack within arm’s reach, as hydration is essential during lactation. Many parents find that using a hands-free pumping bra is highly beneficial, as it holds the flanges securely against the breasts, leaving your hands free to massage your breasts, use your phone, or hold your baby.
Finding the Right Flange Fit
One of the most common causes of pain and low milk output during pumping is using an incorrectly sized breast shield, also known as a flange. Many breast pumps come packaged with standard flange sizes, such as 24mm or 28mm, but these default options do not fit every body. Before your first session, use a ruler or a printable sizing tool to measure the diameter of your nipple at the base, excluding the areola. Add approximately 2mm to 3mm to your measurement to find your starting flange size, which allows your nipple room to expand and move freely inside the tunnel during suction.

Monitoring how your breast tissue behaves inside the flange tunnel during a session will help you determine if you have the correct fit. If the flange is too small, your nipple will rub against the sides of the plastic tunnel, causing friction, redness, and potentially painful blisters or abrasions. Conversely, if the flange is too large, an excessive amount of your areola will be drawn into the tunnel, which can pinch the milk ducts, restrict milk flow, and cause swelling. A perfect fit allows the nipple to move back and forth smoothly in the center of the tunnel with minimal areola movement and no painful rubbing.
If you experience persistent discomfort, localized pain, or notice that your breasts still feel heavy and full after a full pumping session, do not hesitate to seek professional guidance. Consulting a certified lactation consultant (such as an IBCLC) can provide personalized support to address unique anatomical variations. You can also refer to the manufacturer’s detailed sizing guides and alternative flange options to find a solution that ensures comfortable and efficient milk expression.
Setting Up the Spectra S1 Pro for Your First Session
Operating your Spectra S1 Pro for the first time is straightforward once you familiarize yourself with its interface. Refer to the official user manual to locate the power button, the cycle adjustment buttons, the vacuum level controls, and the digital display screen. The display provides real-time feedback on your current settings, battery life, and a convenient timer to help you track the duration of your session. Ensure the built-in rechargeable battery is sufficiently charged, or connect the power adapter to a nearby wall outlet before turning the unit on.
The pump features a dual-phase system designed to replicate the natural feeding patterns of an infant. When you first turn on the device, it is highly recommended to start in the stimulation phase, often referred to as massage mode. This mode uses fast, shallow cycles to gently stimulate the nerves in your nipple, triggering your body’s let-down reflex, which initiates the flow of milk. Once you observe milk dripping or spraying steadily into the collection bottle, you can press the phase transition button to switch to the expression phase, which features slower, deeper suction cycles to empty the breast efficiently.
When initiating your very first session, always start with the lowest vacuum and cycle settings. It is a common misconception that higher suction levels yield more milk; in reality, excessive suction can cause pain, which triggers stress hormones that can actually inhibit your let-down reflex. Gradually increase the vacuum level one step at a time, paying close attention to how your body feels. Stop increasing the settings as soon as you reach a level that feels like a firm but comfortable tugging sensation, ensuring your session remains entirely pain-free.
Adjusting Settings for Comfort and Efficiency
Customizing your pump settings is an ongoing process that may vary from one session to the next. A comfortable let-down is typically characterized by a gentle tingling sensation in the breasts, followed by a steady flow of milk. Once this occurs, transition the pump from massage mode to expression mode. In expression mode, you can adjust both the cycle speed (how many times the pump suctions per minute) and the vacuum strength (the intensity of the suction) to find a combination that mimics your baby’s unique nursing style.
Avoid the temptation to crank the vacuum settings to their maximum limits. High vacuum levels can cause micro-tears in the delicate skin of the nipple, lead to breast tissue engorgement, and cause deep bruising. If you experience sharp pain, pinching, or a burning sensation at any point during your session, immediately lower the vacuum setting or pause the pump. Pumping should never hurt; if discomfort persists even at the lowest settings, turn off the device, break the suction seal by gently inserting a clean finger into the side of the flange, and remove the breast shield.
To maximize efficiency without sacrificing comfort, consider incorporating gentle breast massage or warm compresses before and during your pumping session. Applying a warm, damp cloth to your breasts for a few minutes before you begin can help relax the milk ducts and encourage a faster let-down. During the session, using your hands to gently massage your breasts from the chest wall toward the nipple can help empty all quadrants of the breast more thoroughly, which can naturally increase your overall milk output over time.
Cleaning and Maintaining Your Pump Parts
Maintaining a strict cleaning routine for your pump parts is essential to protect your baby from harmful bacteria and ensure the hygienic collection of breast milk. It is important to distinguish between parts that require washing after every single use and those that do not. Any component that comes into direct contact with your breasts or breast milk—including the flanges, silicone duckbill valves, backflow protector membranes, and collection bottles—must be thoroughly cleaned after each session. The main pump motor unit and the PVC tubing do not come into contact with milk and should never be submerged in water; instead, simply wipe the exterior of the motor unit with a clean, damp cloth if it becomes dusty.
To clean the washable parts, begin by rinsing them under cold, running water immediately after use to prevent milk proteins from drying and sticking to the surfaces. Next, wash all parts in a clean basin dedicated solely to baby feeding items, using warm water and a mild, fragrance-free dish soap. Avoid washing pump parts directly in the kitchen sink, as sinks can harbor bacteria. Use a soft brush to clean the crevices of the flanges and bottles, taking extra care when handling the delicate silicone duckbill valves, as aggressive scrubbing can easily tear them. Rinse the parts thoroughly under running water, then place them on a clean paper towel or a dedicated drying rack in a well-ventilated area to air-dry completely.
Regularly inspect your pump components for signs of wear, moisture, or damage. The tubing should remain completely dry at all times; if you notice condensation or water droplets inside the tubes, run the pump with only the tubing attached for a few minutes to air them out. If you spot any signs of mold, cloudiness, or persistent moisture inside the tubing or backflow protectors, discard and replace them immediately. Keeping a spare set of valves and membranes on hand ensures you can continue pumping without interruption if a part becomes compromised.
Troubleshooting Common Pumping Issues
Experiencing a sudden loss of suction can be frustrating, but it is usually caused by a simple assembly error or a worn-out component. If you notice the suction feels weaker than usual, turn off the pump and inspect all physical connections. Check that the silicone duckbill valves are pushed firmly onto the base of the flanges and that their slit openings are completely closed when not under suction. Ensure the backflow protector casings are snapped tightly together and that the tubing is pushed securely onto both the pump motor ports and the backflow protectors. Even a tiny gap or a loose connection can cause air to leak, resulting in a significant drop in suction power.
If the pump motor fails to turn on or shuts off unexpectedly during a session, check your power source. Verify that the power adapter is plugged securely into a working wall outlet and that the cable is properly connected to the charging port on the back of the pump. If you are relying on the built-in battery, check the battery indicator on the digital display to ensure it is not depleted. If the battery is completely drained, connect the device to the power adapter and allow it to charge for a few minutes before attempting to turn it on again.
For persistent electronic issues, unusual motor noises, or physical damage to the pump housing, avoid attempting any do-it-yourself repairs, as opening the motor casing can void your warranty and compromise safety. Instead, refer to the troubleshooting section of your user manual or contact the manufacturer’s official customer support team for professional assistance. They can guide you on warranty claims, authorized repair services, or replacement options to ensure your device operates safely and effectively.
Frequently Asked Questions (FAQ)
Can I use the Spectra S1 Pro while it is plugged in?
Yes, the Spectra S1 Pro is designed with a built-in rechargeable battery that offers excellent portability, but it can also be operated safely while plugged directly into an electrical outlet. When using the pump while it is charging, always use the official power adapter provided by the manufacturer to ensure voltage compatibility and prevent electrical damage. Position the power cable carefully to avoid tripping hazards, and ensure the cord is not pulled taut, which could damage the charging port on the device over time.
How often should I replace the pump parts?
The replacement frequency of your pump parts depends heavily on how often you pump and how the parts are cleaned. Silicone components, such as the duckbill valves and backflow protector membranes, are highly flexible and stretch with every suction cycle, meaning they wear out faster than rigid plastic parts. If you pump multiple times a day, consider replacing the duckbill valves every 1 to 3 months, and the backflow membranes every 3 to 6 months. Rigid plastic parts like flanges and bottles should be replaced if they show signs of cracking, deep scratches, or persistent cloudiness.
What should I do if milk gets into the tubing?
If you notice breast milk entering the tubing, turn off the pump motor immediately to prevent liquid from being drawn into the internal mechanism. Carefully detach the tubing from both the pump motor and the backflow protector. Wash the affected tubing in warm, soapy water, rinse it thoroughly with clean water, and hang it vertically to air-dry completely before using it again. If the tubing cannot be dried thoroughly, or if you notice any residue or mold growth inside, discard it immediately and replace it with a new, sterile tube to maintain a hygienic pumping environment.

Community discussion
Share your experience or ask a question. Comments are reviewed before publication.