
Successfully expressing breast milk with the S39 breast pump requires a combination of correct mechanical assembly, proper physical alignment, and a comfortable environment that supports your body’s natural reflexes. By understanding how each component fits together and how to adjust the settings to match your personal comfort levels, you can establish an efficient and pain-free pumping routine. This guide walks you through the entire process, from preparing your space to troubleshooting common suction issues, ensuring you get the most out of your S39 breast pump.
Preparing for a Pumping Session: Hygiene and Environment
Before you handle any pump parts or begin a session, personal hygiene is the first line of defense in protecting your expressed milk from contamination. Wash your hands thoroughly with soap and warm water for at least twenty seconds, paying close attention to the backs of your hands, between your fingers, and under your fingernails. Dry your hands with a clean, single-use paper towel or a dedicated cloth towel. Ensure that the surface where you plan to assemble the pump is clean, dry, and free from dust.
The physical environment you choose plays a significant role in how easily your milk flows. Stress and discomfort can trigger adrenaline, which actively inhibits oxytocin—the hormone responsible for the let-down reflex. Find a quiet, comfortable corner in your home, such as a supportive armchair.
Products mentioned in this guide
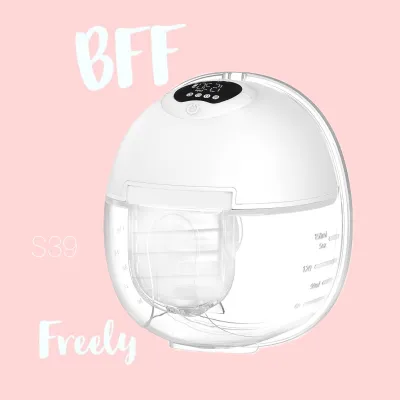
Prices are valid at publication and may change. Please refer to the product page for the latest price.
In warmer climates like Singapore, adjusting your air conditioning or fan to a comfortable, draft-free temperature can help you relax. Keep a glass of water, a light snack, and your phone within arm’s reach so you do not have to interrupt your session. Some parents find that looking at photos of their baby helps stimulate milk flow.
Assembling the S39 Breast Pump Components Correctly
Correct assembly of the S39 breast pump is essential for creating the airtight seal necessary for consistent suction. Begin by laying out all the clean, dry components on your prepared surface. The primary parts typically include the breast shield or flange, the silicone valve, the silicone diaphragm or membrane, the collection bottle or cup, and the tubing that connects to the motor unit. If your S39 model is a wearable, tubeless design, the motor unit will attach directly to the collection cup assembly.

Before putting the parts together, inspect each silicone component carefully. Silicone is a delicate material that can develop micro-tears, warping, or thin spots over time, especially with frequent washing. Even a tiny, barely visible tear in the valve or the diaphragm can cause a complete loss of suction. Gently stretch the edges of the valves to check for splits, and replace any parts that show signs of wear.
To assemble, insert the silicone valve firmly into the base of the breast shield connector, ensuring it sits completely flush. Next, place the silicone diaphragm into the upper chamber of the connector, pressing down around the entire rim to secure an airtight seal. Screw or snap the collection bottle or cup onto the connector assembly, taking care not to cross-thread the plastic parts.
Finally, connect the tubing to the port on the diaphragm cap and attach the other end to the motor unit, or secure the integrated motor unit directly onto the collection kit. Ensure all connections are snug but avoid forcing them.
Verifying the fit of your flange is a critical step that should never be skipped. The flange tunnel must accommodate your nipple comfortably during operation. Refer to the manufacturer’s sizing guidelines, which typically involve measuring the diameter of your nipple base before a pumping session. A properly fitting flange allows your nipple to move freely back and forth in the tunnel without rubbing against the sides, while preventing too much of the surrounding areola from being pulled into the tunnel.
Operating the Pump for Comfort and Efficiency
Operating the S39 breast pump effectively requires starting with gentle settings and gradually adjusting them to match your body’s response. Once the pump is positioned securely against your breast—ensuring your nipple is centered precisely in the flange tunnel—turn on the motor unit. Most modern pumps, including the S39, initiate in a stimulation or massage phase. This phase uses fast, shallow cycles designed to mimic a baby’s rapid initial sucks, which signals your body to release milk. Refer to your S39 user manual to identify the specific button or touchscreen icon that controls this phase.
Once your milk begins to drip or flow steadily—a sign that the let-down reflex has occurred—transition the pump to the expression phase. This phase features slower, deeper suction cycles that mimic the active swallowing of a baby. If your pump does not transition automatically, press the mode button indicated in your manual. Gradually increase the vacuum or suction level one step at a time until you find your maximum comfortable setting.
Pumping should never be painful; if you feel pinching, pulling, or discomfort, immediately lower the suction level. High suction does not equate to more milk and can actually restrict milk flow by causing tissue inflammation.
To maximize milk output and ensure your breasts are thoroughly emptied, you can combine mechanical pumping with physical techniques. Gentle breast massage or hands-on pumping can significantly improve milk expression. Use your free hand to gently massage your breast from the chest wall toward the nipple, focusing on any areas that feel firm or full. Applying light, steady compression with your fingers and thumb in a “C” shape around the breast during the suction cycle can also help release stubborn milk pockets.
Pay close attention to your body’s physical signals throughout the session. If you experience sharp pain, blanching (where the nipple turns white), or noticeable swelling of the nipple or areola, stop the pump immediately. These signs suggest that either the suction is set too high, the flange size is incorrect, or the pump is misaligned. A typical pumping session lasts between fifteen and twenty minutes per breast, but you should stop sooner if milk flow has ceased.
Post-Pumping Care: Milk Storage and Equipment Cleaning
Once your pumping session is complete, turn off the motor unit before breaking the suction seal on your breast. Gently insert a finger between your breast and the flange to release the vacuum safely, preventing skin abrasion. Pour the expressed milk immediately into a clean, food-grade storage container, such as a breast milk storage bag or a BPA-free bottle.
When storing your milk, follow standard health authority guidelines, such as those from pediatric associations or local health boards. In Singapore’s warm and humid climate, expressed milk should not be left at room temperature for extended periods; place it in the refrigerator or freezer as soon as possible. Label each container clearly with the date and time of expression, and use the oldest milk first. Avoid storing milk in the refrigerator door, where temperature fluctuations occur; instead, place it in the coldest part near the back.
Immediately disassemble all parts of the pump kit that have come into contact with breast milk. Leaving milk residue on the parts encourages bacterial growth and can create a stubborn film that is difficult to remove. Rinse the parts in cool water first to remove residual milk, then wash them in warm, soapy water using a mild dishwashing liquid. Use a dedicated brush that is only used for baby feeding equipment to avoid cross-contamination.
Rinse the parts thoroughly under running water to remove all soap residue. Allow the components to air-dry completely on a clean paper towel or a dedicated drying rack in a well-ventilated area. In humid environments, ensuring complete dryness is crucial to prevent mold growth. Never wash or submerge the motor unit or the silicone tubing in water; if the tubing becomes damp or dirty, refer to the manufacturer’s instructions for cleaning or replacement. Store the fully dried, clean parts in a dust-free container or a protected cabinet until your next session.
Troubleshooting Suction Loss and Discomfort
If you experience a sudden loss of suction during a session, do not panic; most issues can be resolved with a few quick checks. Start by turning off the pump and inspecting the tubing connections. Ensure the tubing is pushed firmly onto the ports of both the motor unit and the diaphragm cap, with no visible kinks or bends. If your model is wearable, check that the motor unit is clicked securely into place on the collection cup.
Next, examine the silicone parts. A misaligned duckbill valve or a diaphragm that is not seated perfectly in its groove will prevent the pump from building a vacuum. Remove these parts, dry them completely, and reassemble them carefully, ensuring there are no gaps. If the suction remains weak, inspect the silicone for tiny tears or punctures that may have developed during cleaning. Replacing these worn parts with spares usually restores full suction power immediately.
Persistent physical discomfort during or after pumping is a clear signal that something needs adjustment. Re-evaluate your flange size; your breast shape and nipple size can change throughout your breastfeeding journey, meaning a flange that fit well in the first week may become too small or too large later on. Additionally, check your pumping posture. Sitting hunched over can restrict milk flow and cause back strain; sit upright and let gravity assist the milk flow into the collection container.
There are certain situations where you must stop using the pump immediately to protect your safety and the integrity of the device. If the motor unit becomes unusually hot to the touch, emits a burning smell, or makes strange, grinding noises, turn it off and unplug it. Do not attempt to use a damaged or malfunctioning electrical device. If you experience persistent physical pain, bleeding, or signs of a breast infection such as localized redness, warmth, or a fever, consult a healthcare professional or a certified lactation consultant immediately. For technical issues with the device, reach out to the manufacturer’s customer support team.
Frequently Asked Questions (FAQ)
How do I know if my flange size is correct for the S39 pump?
Observe your nipple’s movement inside the flange tunnel while the pump is running. In a correctly sized flange, your nipple should move freely back and forth without rubbing against the tunnel walls, and very little to no areola should be drawn into the tunnel. If you notice friction, redness, or if your nipple does not move easily, the flange is likely too small. Conversely, if a large portion of your areola is pulled into the tunnel, the flange is too large. Refer to the measurement guide in your S39 documentation to find your exact size.
Can I use the S39 breast pump while it is plugged into the charger?
You must check the specific S39 user manual to verify if your model supports pass-through charging, as operating some rechargeable breast pumps while plugged in can overheat the battery or damage the internal circuitry. To preserve the overall lifespan of your rechargeable battery, it is generally recommended to charge the device fully before use and unplug it once the charging cycle is complete. Avoid leaving the pump connected to the charger overnight or using non-compliant charging cables.
How often should I replace the silicone valves and membranes?
There is no universal timeline for replacing silicone parts, as wear depends heavily on how often you pump and your cleaning methods. Generally, active pumpers may need to replace duckbill valves every one to three months, and silicone diaphragms every three to six months. Inspect these parts regularly for signs of degradation, such as stretching, loss of elasticity, cloudiness, or micro-tears. If you notice a gradual drop in suction power that cannot be resolved by reassembly, replacing these silicone components is usually the solution.

Community discussion
Share your experience or ask a question. Comments are reviewed before publication.