
Expressing breast milk directly into a storage container is a highly efficient way to preserve every drop of liquid gold. By eliminating the need to transfer milk from a collection bottle to a separate storage bag or cup, you minimize the risk of spills, reduce cleanup time, and maintain a highly hygienic, closed system. To successfully attach Avent storage cups directly to your breast pump, you must understand how to configure the connection points, verify compatibility across your specific equipment, and establish a secure, airtight seal. This guide provides a comprehensive walkthrough to help you assemble, use, and troubleshoot your storage cup setup for a seamless pumping experience.
Check Compatibility and Gather Your Supplies
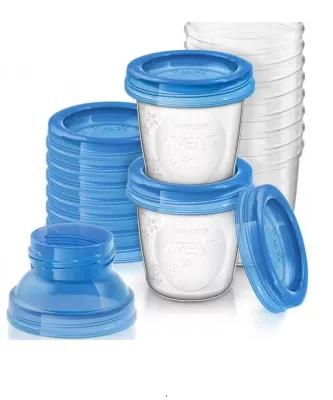
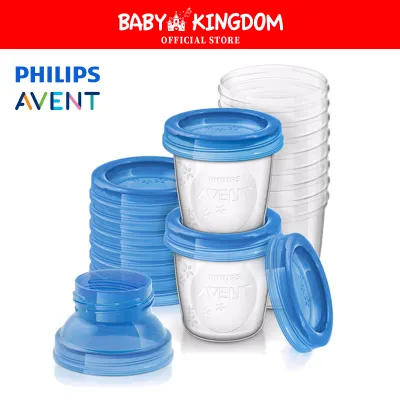
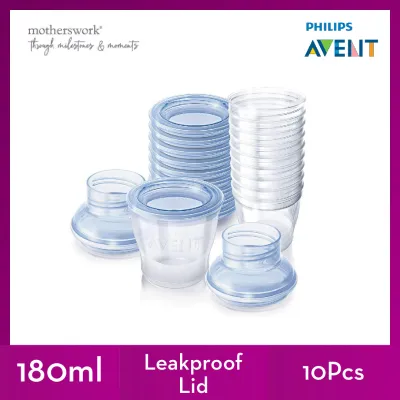
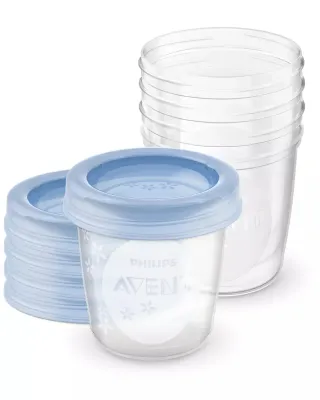
To begin, you must verify that your breast pump model is compatible with the storage cups you plan to use. Breast pump manufacturers design their flanges and connectors with specific thread patterns and neck widths, which typically fall into either wide-neck or narrow-neck categories. Avent storage cups feature a wide-neck design with a specific thread pitch, meaning they will not screw directly onto narrow-neck pump bodies or certain alternative wide-neck brands without an intermediary component.
Refer to the user manuals for both your breast pump and your storage cups to identify the exact parts required for a secure connection. Many setups require a dedicated adapter or connector ring. This adapter acts as a bridge, featuring threads on one side that match your pump’s flange or motor-housing connector, and threads on the other side that lock securely onto the rim of the storage cup. If you are using an Avent pump, these adapters are often included in the pump kit or the storage cup starter pack, but if you are using a pump from another manufacturer, you will need to verify if a compatible cross-brand adapter is available.
Products mentioned in this guide
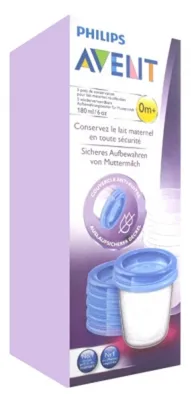
Prices are valid at publication and may change. Please refer to the product page for the latest price.
Before assembling your equipment, perform a thorough physical inspection of all components. Examine the plastic threads on both the storage cup and the adapter for any signs of flattening, stripping, or cracking. Inspect the silicone seals, O-rings, and gaskets for warping, stretching, or micro-tears. Even a microscopic gap in a silicone seal can allow air to enter the system, which compromises the vacuum pressure of your pump and can lead to slow milk expression or sudden leaks. If you notice any wear or damage, replace the affected part before proceeding with your pumping session.
Step-by-Step Assembly Guide
Assembling your pumping setup correctly is the most critical step in preventing leaks and maintaining consistent suction. Start by washing your hands thoroughly with soap and water, and ensure you are working on a clean, dry surface. Lay out your pump flange, the adapter ring, the silicone seal, and the clean storage cup.

First, position the silicone seal or adapter ring onto the connector. If your adapter uses a removable silicone gasket to ensure an airtight fit, press it firmly into its designated groove. Ensure the seal lies completely flat without any twists, folds, or gaps, as an uneven gasket is a primary cause of vacuum loss. If the gasket is dry or slightly misaligned, gently press it down with clean fingers until it sits flush against the plastic rim.
Next, align the threads of the adapter with the rim of the storage cup. Hold the cup upright in one hand and the adapter in the other, ensuring they are perfectly parallel. Slowly turn the adapter clockwise onto the cup. If you feel resistance or if the adapter sits at an angle, stop immediately and unscrew it. Forcing a misaligned connection causes cross-threading, which permanently damages the plastic threads and prevents a secure seal from ever forming.
Once the threads are aligned, screw the adapter onto the cup until it is snug. Tighten the connection firmly, but avoid over-torquing. Applying excessive force can strip the plastic threads, warp the silicone gasket, or crack the collar of the cup. A good rule of thumb is to tighten until you feel firm resistance, then stop.
Finally, perform a quick visual and tactile inspection of the assembled unit. Run your finger around the joint where the adapter meets the cup to ensure there is an even, gap-free connection all the way around. Gently tug the adapter to confirm it is locked securely in place and will not slip off under the weight of the expressed milk.
Pumping Directly Into the Storage Cup
Once your storage cup is securely attached to the pump flange, you must adapt your pumping technique to accommodate the unique shape and weight of the cup. Unlike standard, slim collection bottles, wide-neck storage cups have a wider center of gravity and can become quite heavy as they fill with milk.
To maintain a proper seal against your breast, position yourself comfortably in an upright or slightly forward-leaning posture. Keep the attached storage cup aligned with gravity, pointing straight down toward the floor. If you lean too far back or tilt the cup sideways, the expressed milk can pool around the flange tunnel or the adapter joint instead of draining directly into the cup. This pooling can compromise the vacuum seal or cause milk to back up into the pump’s tubing or backflow protector.
As you pump, monitor the milk level inside the cup continuously. Storage cups feature printed measurement markings, including a maximum fill line. It is essential to stop pumping before the milk reaches this line. Leaving adequate headspace is crucial, especially if you plan to freeze the milk, as liquid expands when frozen and can push the lid open or crack the cup if overfilled.
Because of the added bulk of the storage cup, you may need to adjust how you support the pump. If you use a hands-free pumping bra, ensure the bra’s openings are wide enough to accommodate the adapter and cup without putting upward pressure on the flange, which can break the suction. If you are holding the pump manually, cradle the bottom of the storage cup with your hand to relieve tension on your breast and prevent the weight of the filling cup from pulling the flange away from your skin.
Safely Detaching, Storing, and Cleaning
When your pumping session is complete, turn off the breast pump motor first and break the vacuum seal against your breast by gently inserting a finger between your skin and the flange. Never pull the flange directly off your breast while the pump is still running, as this can cause discomfort and stretch the delicate breast tissue.
Once the pump is off, hold the storage cup firmly at its base and carefully unscrew the pump flange or adapter. To maintain a closed, hygienic system, place the storage lid directly onto the cup immediately after detaching it. Secure the lid tightly to prevent any accidental spills or exposure to airborne contaminants.
Before placing the cup in storage, label it clearly. Use a water-resistant pen or a removable label to write the date, time of expression, and the volume of milk on the designated writing area of the cup. This practice is essential for proper milk rotation, ensuring you always use the oldest milk first.
Promptly transfer the sealed cup to the refrigerator or freezer. In warm, humid tropical environments like Singapore, ambient room temperatures can accelerate bacterial growth in freshly expressed milk. Placing the milk in the coldest part of the refrigerator—typically near the back of the main shelves rather than in the door pockets—ensures rapid cooling and preserves the nutritional quality of the milk.
After storing the milk, disassemble all pump parts, adapters, and storage cups completely. Wash them in warm, soapy water using a mild dishwashing liquid, rinse thoroughly with clean water, and allow them to air dry on a clean rack. Sanitize the parts regularly according to the manufacturer’s instructions, especially during your baby’s first few months.
Troubleshooting Leaks and Connection Issues
If you experience leaks or a loss of suction during your pumping session, a systematic troubleshooting approach can quickly identify and resolve the issue. The most common cause of a compromised seal is a misplaced or damaged silicone gasket. Pause your pump, disassemble the adapter, and inspect the silicone ring. If it is pinched, twisted, or dusty, clean it, dry it, and re-seat it flat within the adapter channel.
Another frequent culprit is dried milk residue or moisture on the threads of the cup or adapter. Even a small drop of dried milk can prevent the threads from interlocking fully, creating a microscopic gap where air can escape. Wipe the threads of both the cup and the adapter with a clean, damp cloth, dry them thoroughly, and reassemble the unit.
If you are using third-party adapters to connect your Avent cups to a non-Avent pump, double-check that the adapter is specifically rated for your pump model. Some adapters may look similar but have minor differences in thread pitch or diameter, leading to structural gaps that slowly leak milk or lose vacuum pressure over time.
Finally, inspect the physical integrity of your storage cups. Over time, repeated washing, sterilizing, and freezing can cause plastic to degrade. If you notice any hairline cracks, particularly around the rim, or if the threads on the cup appear stripped and no longer hold the adapter tightly, discard the cup immediately. Using damaged components compromises hygiene and risks a major spill of expressed milk.
Frequently Asked Questions (FAQ)
Can I use Avent storage cups with non-Avent breast pumps?
Yes, you can use Avent storage cups with many non-Avent breast pumps, provided you use a compatible adapter. Many manufacturers produce wide-neck or narrow-neck adapters designed to bridge different brand ecosystems. However, you must never force incompatible threads together, as this will strip the plastic and cause leaks. Always consult the user manuals of both your pump and the cups to verify compatibility before attempting to connect them.
How full can I fill the storage cup while pumping?
You should only fill the storage cup up to the maximum fill line indicated on the side of the cup, which is typically slightly below the rim. Leaving this headspace is critical because breast milk expands as it freezes. If you fill the cup to the very top, the expanding milk can force the lid open, crack the plastic, or compromise the sterile seal. If you reach the limit during a session, pause the pump and switch to a fresh cup.

Community discussion
Share your experience or ask a question. Comments are reviewed before publication.