
Adjusting your Baebear baby carrier to maintain the correct ergonomic M-position is essential for supporting your baby’s developing hips and spine. To achieve this safe posture, you must configure the carrier’s seat base to support your baby’s thighs fully from knee to knee, secure the waistband high on your torso, and adjust the shoulder straps to preserve the natural curve of their spine. By systematically setting up the foundation of the carrier before tightening the upper straps, you can ensure your baby remains in a secure, comfortable, and ergonomically sound position throughout your journey.
Proper carrier adjustment is not just about comfort; it directly influences your baby’s physical development. When a baby is carried incorrectly, with their legs hanging straight down, it can place undue strain on their immature hip joints. Taking a few minutes to understand the mechanics of your carrier and performing routine safety checks will give you peace of mind while keeping your little one cozy and safe.
Understanding the Ergonomic M-Position and Spine Support
The ergonomic M-position, often referred to as the spread-squat position, is the healthiest way for a baby’s hips to rest while being carried. In this position, the baby’s hips are flexed, and their knees are positioned slightly higher than or level with their hip joints. The fabric of the carrier must support the thighs fully, extending all the way to the back of the knees, which allows the lower legs to dangle freely. This configuration reduces the risk of hip dysplasia by ensuring the ball of the hip joint sits securely within its socket.
Products mentioned in this guide
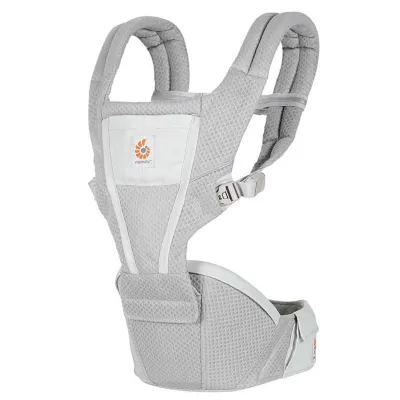
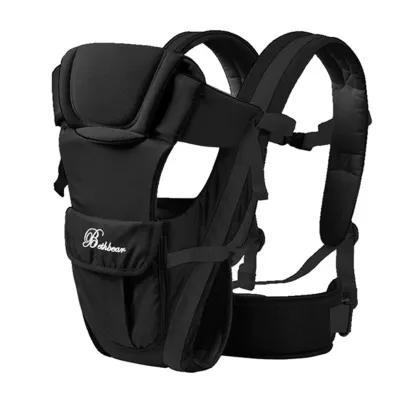
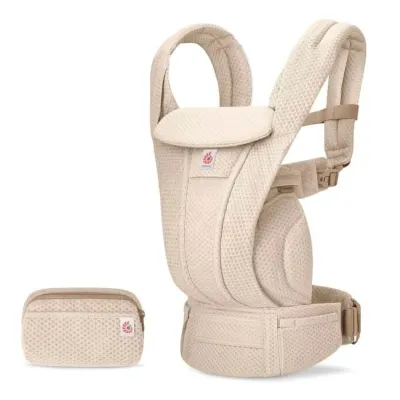
Prices are valid at publication and may change. Please refer to the product page for the latest price.
Alongside hip alignment, supporting the natural shape of your baby’s spine is a critical aspect of ergonomic carrying. Newborns are born with a natural C-shaped curve in their spine, which gradually develops into an S-shape as they learn to hold up their head, sit, and walk. An ergonomic carrier should gently hug your baby’s back, maintaining this natural C-curve without forcing their spine into an unnaturally straight or slumped posture. If the carrier is too loose, the baby may slump, which can compromise their airway; if it is too tight, it can flatten their spine and place pressure on their developing back muscles.
Your baby’s developmental stage, weight, and hip maturity will dictate the specific adjustments required for their carrier. Newborns require a narrower seat width and maximum neck support, whereas older infants with more hip control and longer legs need a wider seat base to maintain the knee-to-knee support. Always monitor your baby’s growth milestones and adjust the carrier’s settings gradually to match their changing physical proportions.
Preparing Your Baebear Carrier and Baby
Before attempting to place your baby in the Baebear carrier, it is essential to establish the correct baseline settings based on their current size. Begin by consulting the manufacturer’s label and instruction manual to verify the weight and height limits for your specific model. These guidelines will also outline the approved carrying positions for your baby’s age, such as front inward-facing, front outward-facing, or back carrying. Never assume suitability based on age alone, as physical development and weight are the primary safety indicators.

Next, locate the seat width adjustment mechanism on your carrier, which may consist of buttons, snaps, slides, or hook-and-loop fasteners depending on the model. Adjust this base to match the length of your baby’s thighs, measuring from the back of one knee to the back of the other. The goal is to provide complete support across the entire seat without the fabric extending past the knees, which could force the lower legs straight or restrict circulation.
Finally, prepare the carrier by untangling all straps, webbing, and buckles. Lay the carrier flat or hold it up to ensure the waistband is straight and the shoulder straps are set to a neutral, loose starting position. This preparation makes it much easier to tighten the straps evenly once your baby is in place, preventing lopsided adjustments that can cause discomfort for both you and your little one.
Step-by-Step Adjustment Guide for the M-Position
Achieving a perfect ergonomic fit relies on a systematic, bottom-up approach to adjusting your carrier. By securing the lower foundation first and then fine-tuning the upper body support, you can easily position your baby’s hips and spine correctly.
Setting the Waistband and Seat Base
The waistband is the foundation of your baby carrier, responsible for distributing the majority of your baby’s weight to your hips and protecting your lower back. Position the waistband snugly around your waist or high on your hips, ensuring it sits completely level from front to back. Fasten the main buckle securely and pull the webbing tight; a loose waistband will sag under your baby’s weight, pulling the carrier forward and flattening the ergonomic seat.
Once the waistband is secure, double-check the seat base adjustment. The fabric should be wide enough to support your baby’s thighs fully but not so wide that it forces their knees to bend awkwardly or prevents their lower legs from swinging freely. If the fabric bunches up or cuts into the back of your baby’s knees, the seat is too wide and must be narrowed before proceeding.
With the waistband and seat base configured, prepare to place your baby into the carrier by ensuring their bottom will sit deeply in the fabric panel. This deep seat is achieved by tilting the baby’s pelvis slightly forward and upward as you lower them in. This pelvic tilt naturally encourages their knees to rise above their hips, creating the desired M-shape and preventing them from slumping down or leaning to one side.
Positioning the Baby and Securing the Straps
Carefully lift your baby and hold them against your chest, ensuring their legs are spread naturally around your torso. Slide your baby’s legs through the designated leg openings, guiding the seat fabric so it smoothly supports their thighs from knee to knee. Ensure the fabric is flat against their skin and not bunched up, which can cause pressure points and disrupt their hip alignment.
While supporting your baby’s weight with one hand, pull the carrier’s back panel up over their back. Slip your arms through the shoulder straps one at a time, then reach behind your upper back to secure the sternum strap or cross-straps, depending on your carrier’s design. Begin tightening the shoulder straps evenly, pulling the webbing backward or forward as directed by your manual, until the baby is held snugly against your chest.
As you tighten the straps, pay close attention to the tension across the back panel. The panel should be tight enough to support your baby’s back and neck securely, preventing them from pulling away from your body, but not so tight that it flattens their natural spinal curve. Verify that the top of the back panel reaches the appropriate height for your baby’s developmental stage; for younger babies without head control, the panel should support them up to the nape of their neck, while older babies can have the panel sit lower near their shoulder blades.
Verifying the Fit and Safety Checks
Once your baby is secured in the carrier, you must perform a series of visual and physical safety checks to ensure their airway is clear and their posture is correct. First, look down at your baby’s face to confirm their airway is completely unobstructed. Their face must be fully visible, with their chin lifted off their chest and their nose and mouth clear of any fabric, clothing, or your body.
Use the two-finger rule to verify both safety and comfort. You should be able to fit two fingers easily between your baby’s chin and chest to ensure their airway remains open. Additionally, check the tension of the shoulder straps by sliding two fingers under the fabric near your collarbone; the straps should feel snug and supportive without digging into your skin or compressing your baby’s body too tightly.
Finally, observe your baby’s leg position after you have walked around for a few minutes. Movement can cause the fabric to shift, so verify that the M-position is still maintained, with their knees higher than their hips and their lower legs dangling freely. If you notice the fabric has bunched up under their bottom or shifted toward one side, pause and readjust the seat to restore proper hip support.
Troubleshooting Common Adjustment Issues
Even with careful setup, you may encounter common fitting issues that compromise your baby’s ergonomic posture or your own comfort. One frequent problem is fabric bunching under the baby’s bottom, which flattens the seat and ruins the M-shape. To resolve this, gently lift your baby’s thighs from underneath and smooth the seat fabric outward toward their knees before tightening the shoulder straps.
If you experience shoulder, neck, or lower back pain while carrying your baby, it is usually a sign of improper weight distribution. Ensure your waistband is positioned high enough on your torso and is tightened sufficiently to bear the baby’s weight. If the waistband is too loose, the shoulder straps will pull downward, straining your upper body; adjusting the height of the sternum strap can also help redistribute the load across your upper back.
As your baby grows, you will eventually notice signs that they have outgrown their current seat width setting. If the fabric no longer reaches the back of their knees, leaving a significant portion of their thighs unsupported, their legs will begin to hang straight down. When this occurs, refer to your instruction manual to expand the seat base to the next setting, ensuring continuous knee-to-knee support.
Frequently Asked Questions (FAQ)
Can I use the Baebear carrier if my baby's legs hang straight down?
No, you should not use the carrier if your baby’s legs hang straight down, as this indicates their hips are not properly supported. When a baby’s legs dangle straight, the weight of their lower limbs pulls on the hip joints, which can increase the risk of hip dysplasia or joint strain. This issue typically occurs when the seat base is adjusted too narrow for the baby’s size or if the baby is not seated deeply enough in the carrier. If you cannot achieve the correct M-position with their knees higher than their hips, stop using the carrier immediately, consult the manufacturer’s sizing chart, and adjust the seat width to match their physical development.
How often should I recheck the carrier adjustments as my baby grows?
You should perform a quick check of your carrier’s adjustments before every single use, as babies grow rapidly and changes in their clothing thickness can affect the fit. A thick winter jumpsuit or a light summer outfit will alter how snugly the straps fit and how your baby sits in the seat. Additionally, you should conduct a comprehensive review of the seat width and carrying positions whenever your baby reaches a major developmental milestone, such as gaining full neck control, sitting up independently, or transitioning to a new weight bracket. Regularly updating these settings ensures your carrier continues to provide optimal ergonomic support at every stage of growth.

Community discussion
Share your experience or ask a question. Comments are reviewed before publication.