
Adjusting your baby carrier correctly is the most important step in ensuring a safe, comfortable, and ergonomically sound babywearing experience. To achieve the ideal ergonomic position in the Ergobaby Alta, you must systematically adjust the seat width, back panel, waist belt, and shoulder straps. This ensures your baby sits in the recommended “M” position—where their knees are slightly higher than their hips—and their spine maintains a natural, gently curved shape. Proper adjustments not only protect your baby’s developing hips and spine but also distribute their weight evenly across your shoulders and hips, preventing caregiver fatigue and back strain.
Pre-Adjustment Checks and Safety Boundaries
Before placing your baby in the carrier, you must verify that they meet all the manufacturer’s physical requirements. Check the product label or the instruction manual for the minimum and maximum weight limits, as well as any specific developmental milestones required for different carrying positions. For example, certain carrying positions, such as outward-facing or back carrying, require your baby to have strong, consistent head and neck control. Never assume your baby is ready for a specific position based solely on their age; always assess their physical development and consult the manufacturer’s guidelines.
Next, perform a thorough visual and tactile inspection of the carrier itself. Examine all buckles, fasteners, zippers, and snaps to ensure they are fully functional and free of cracks or debris. Inspect the fabric seams, shoulder straps, and waist belt webbing for any signs of fraying, tearing, or weakened stitching. If you identify any damage or wear that could compromise the structural integrity of the carrier, suspend use immediately and contact the manufacturer for guidance.
Products mentioned in this guide
![[Ready stock]Ergo baby Alta Hip Seat Baby Carrier](https://img.lazcdn.com/g/ff/kf/S52b6452743474981b6dd588ab4f75d3aH.jpg_400x400q80.jpg_.webp)
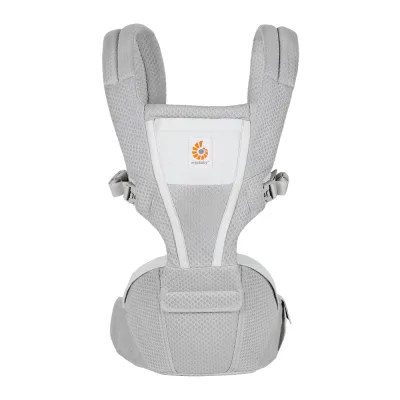
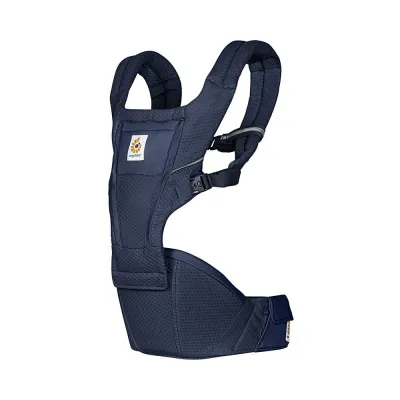

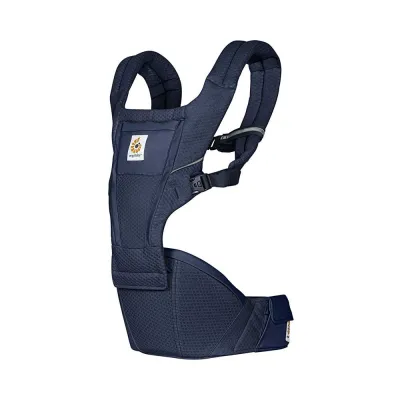
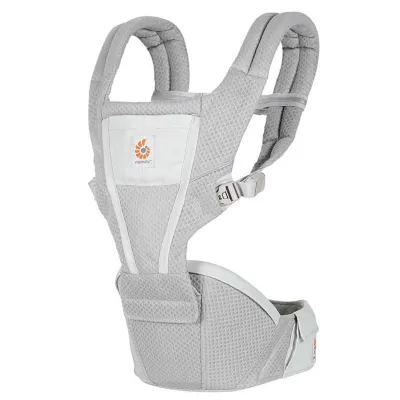

![[Ready stock]Ergo baby Alta Hip Seat Baby Carrier](https://img.lazcdn.com/g/p/2c179e746e091486e346c48507f7eabb.jpg_400x400q80.jpg_.webp)
Prices are valid at publication and may change. Please refer to the product page for the latest price.
Safety also requires constant monitoring of your baby’s physical state while in the carrier. In warm, humid environments like Singapore, pay close attention to temperature regulation. Dress your baby in lightweight, breathable clothing and check their neck or chest frequently to ensure they are not overheating. If your baby shows any signs of respiratory distress, such as rapid breathing, grunting, or flaring nostrils, or if they appear unusually lethargic, remove them from the carrier immediately. If these symptoms persist, seek professional medical care or consult a pediatrician right away.
Setting the Seat Width for Hip Health
The foundation of proper babywearing ergonomics lies in the positioning of the baby’s hips and thighs. The Ergobaby Alta is designed with a structured seat that supports the baby’s pelvis and upper legs. To prevent hip strain and support healthy joint development, you must adjust the seat width so that the fabric supports your baby’s thighs from knee crease to knee crease. This support ensures that the baby’s legs do not dangle straight down, which can pull the hip joints out of alignment and increase the risk of hip dysplasia.

To adjust the seat width, refer to the specific instructions in your product manual for your baby’s current size and developmental stage. The carrier utilizes adjustable panels or fasteners to widen or narrow the seating area. When adjusted correctly, the seat should allow your baby’s hips to spread naturally, with their thighs supported and their knees bent at a level slightly higher than their hips. This creates the classic “M” shape, also known as the spread-squat position, which is widely recommended by pediatric orthopedists.
As you secure your baby, check that their weight is fully supported by their bottom and thighs, rather than their crotch. The fabric should not bunch up between their legs, nor should it force their knees too far apart. If the seat is too wide, it may press against the back of your baby’s calves, forcing their lower legs outward and causing discomfort. If the seat is too narrow, their thighs will drop, leaving their legs dangling. Regularly reassess the seat width as your baby grows to ensure the fabric always aligns perfectly with their changing proportions.
Adjusting the Back Panel and Head Support
The back panel of the carrier must be configured to support the natural, gentle curve of your baby’s spine while keeping their airway completely clear. For younger infants who are still developing upper body strength, the back panel must provide snug support along the entire length of their back. However, the fabric must never cover your baby’s face or nose. For smaller babies, you may need to roll or fold the top edge of the panel downward to ensure it does not rise above their ear level, keeping their face fully visible to you at all times.
The head and neck support features of the carrier must be adjusted based on whether your baby is awake or asleep. When your baby is awake and active, the support can be lowered to allow them to look around and engage with their environment, provided they have sufficient neck control. If your baby falls asleep, raise and secure the head support to prevent their head from tilting backward or slumping to the side. Always ensure that any hood or head cover used for sun protection or sleep support allows for continuous, unobstructed airflow around your baby’s face.
Verify that the height of the back panel aligns correctly with your baby’s size. For older babies with full head and neck control, the panel should typically reach up to their armpits or shoulders, allowing them to move their arms freely while still keeping their torso securely supported. If the panel is too low, your baby may lean too far outward, shifting their center of gravity and creating a fall hazard. If the panel is too high, it can restrict their head movement and block their view, leading to fussiness and discomfort.
Fitting the Shoulder Straps and Waist Belt
Achieving a comfortable fit for the caregiver is just as important as ensuring the baby’s ergonomic positioning. Start by positioning the wide waist belt high on your waist or hips. For carriers that feature a structured hip seat like the Ergobaby Alta, placing the belt higher on your natural waist—above your hips—is often necessary to distribute the baby’s weight effectively across your pelvis and lower body. Fasten the waist belt buckle securely and pull the webbing tight so that the belt fits snugly and does not sag or tilt forward under your baby’s weight.
Once the waist belt is secure, lift your baby into the carrier and slide the shoulder straps over your shoulders. While supporting your baby with one hand, tighten the shoulder straps one at a time. The straps should be tight enough to hold your baby’s torso snugly against your chest, preventing them from slumping down or leaning away from you. A helpful benchmark is the “close enough to kiss” rule: when you bend your head forward, you should be able to easily kiss the top of your baby’s head without straining.
Finally, fasten and adjust the chest strap (or back strap, depending on whether you are carrying on your front or back). This strap connects the two shoulder straps and prevents them from slipping off your shoulders. Position the chest strap in the middle of your shoulder blades for a front carry, or across your chest for a back carry. Tighten it so that the shoulder straps run parallel and feel secure, but do not overtighten it to the point where it restricts your breathing or pulls the shoulder straps uncomfortably close to your neck.
Verifying the Final Ergonomic Position
Before you begin walking or performing daily activities, always conduct a final safety and ergonomic check. A reliable way to verify the positioning is to run through the standard visual checks often summarized by babywearing safety organizations. First, ensure the carrier is tight enough to support your baby securely; any slack in the fabric can cause your baby to slump, which can restrict their breathing. Second, make sure your baby is in view at all times simply by looking down, with no fabric or clothing covering their face.
Third, confirm that your baby is close enough to kiss by gently bending your head forward. Fourth, check their chin position: there should always be a gap of at least two fingers between your baby’s chin and their chest to keep their airway fully open. If their chin is pressed against their chest, their breathing can be seriously compromised. Fifth, ensure their back is supported in its natural curved position, with their bottom settled deeply into the seat of the carrier.
Observe your baby’s overall comfort, breathing pattern, and limb position after all adjustments are complete. Their hands should be positioned near their face or chest, allowing them to self-soothe, and their legs should remain in the relaxed “M” shape. If you feel any uneven strain on your shoulders or lower back, or if you notice your baby slumping to one side, find a safe place to sit down, support your baby, and readjust the straps. Taking a few moments to fine-tune the fit ensures a safe, comfortable, and enjoyable experience for both you and your baby.
Frequently Asked Questions (FAQ)
What should I do if my baby's chin rests on their chest?
If your baby’s chin is resting on their chest, you must correct their position immediately to prevent airway obstruction. First, support your baby’s bottom with one hand and gently loosen the shoulder straps slightly to allow you to reposition their torso. Slide your hand inside the carrier and gently tilt your baby’s pelvis so their bottom settles deeper into the seat, which naturally helps upright their spine.
Next, ensure the waist belt is positioned high enough on your torso; if the belt is too low, the baby will sag, causing their chin to drop. Once the baby’s pelvis is tilted and their spine is aligned, gently lift their chin up away from their chest. Tighten the shoulder straps again to secure them in this upright position, and verify that the back panel provides firm, snug support along their upper back to prevent them from slumping forward again.
Can I use the Ergobaby Alta for a newborn without an infant insert?
To determine if you can use the Ergobaby Alta for a newborn, you must consult the specific model’s instruction manual and verify the minimum weight and developmental requirements. Many structured carriers and hip-seat models have a higher minimum weight threshold and are designed for babies who have already developed some trunk and neck control. Using a carrier that is too large for a newborn can lead to slumping, which poses a severe risk of airway obstruction.
Check the manufacturer’s guidelines to see if your specific carrier version requires a separate infant insert or if it has an adjustable base that can be narrowed for newborns. If your baby does not meet the minimum weight or developmental milestones specified by the manufacturer, do not attempt to use the carrier. Always prioritize safety by following the exact instructions provided for newborn positioning, ensuring their head is fully supported and their airway remains completely clear.
Community discussion
Share your experience or ask a question. Comments are reviewed before publication.