
Deciding whether to invest in a dedicated diaper bin or rely on a standard lidded trash can is a common dilemma for new parents. While specialized diaper bins are engineered specifically to isolate and contain the strong odors associated with soiled diapers, a high-quality regular bin with a tight-fitting lid can also perform well when paired with the right disposal habits. The ultimate effectiveness of either option depends heavily on your household routine, nursery ventilation, and budget. In warm, humid environments like Singapore, where ambient heat and moisture can accelerate organic decomposition and intensify smells, choosing the right setup becomes even more critical for maintaining a fresh and hygienic home.
The Core Difference: How Diaper Bins and Regular Bins Trap Odor
The fundamental difference between a dedicated diaper bin and a regular trash can lies in their design philosophy and mechanical construction. Dedicated diaper bins are built with the primary goal of minimizing air exchange when a diaper is deposited. They often feature specialized internal mechanisms, such as spring-loaded trap doors, double-sealed lids, or twisting systems that wrap each diaper individually in a continuous layer of plastic film. These designs ensure that the main waste compartment remains sealed off from the room even when the outer lid is opened, preventing the sudden puff of foul air that often accompanies standard trash cans.
In contrast, a regular bin with a lid relies on a simple physical barrier to contain odors. When the lid is closed, gravity and the fit of the rim keep the air inside. However, every time you open a standard bin to drop in a new diaper, the entire volume of accumulated, odor-laden air escapes directly into the room. While some high-quality regular bins feature tight seals, they lack the secondary internal barriers that keep the waste isolated during the actual act of disposal. Ultimately, how well either system controls odor in your home will depend on your daily emptying frequency, your bagging technique, and the overall ventilation of your nursery.
Products mentioned in this guide
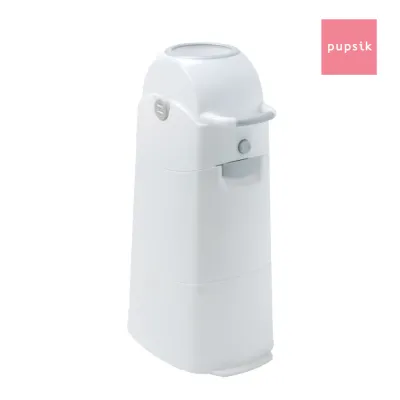
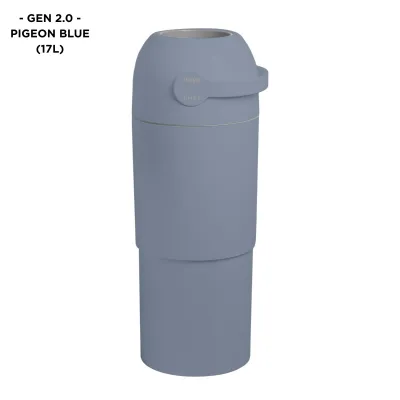
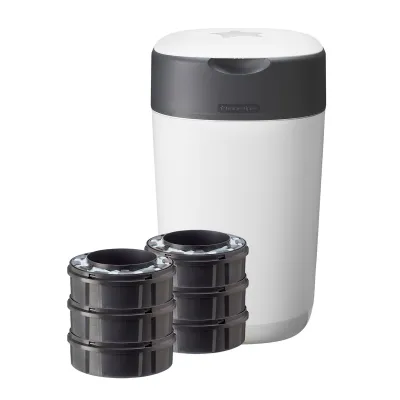
Prices are valid at publication and may change. Please refer to the product page for the latest price.
Key Factors That Determine Odor Control Effectiveness
To determine which bin will perform best in your nursery, it is essential to look beyond marketing claims and evaluate the specific physical features that contribute to airtight containment. Both specialized diaper bins and regular trash cans vary widely in their construction quality, material composition, and operational design. By understanding these key variables, you can make an informed choice based on observable product features rather than brand promises.

Seal Mechanisms and Airflow Design
When evaluating any bin for odor control, the seal mechanism is your first line of defense. For dedicated diaper bins, inspect the physical design for features like rubber or silicone gaskets along the lid joints, double-lid systems, or weighted trap doors. A double-lid system acts as an airlock: you open the outer lid, drop the diaper onto a trap door, close the outer lid, and then the diaper falls into the main compartment without exposing the room to the accumulated waste below.
For regular bins, pay close attention to the lid fit and hinge tension. A loose-fitting lid will allow warm, expanding air to seep out continuously, especially in humid climates. Look for bins with a heavy lid or a strong spring mechanism that pulls the lid down tightly against the rim. Some regular bins also feature rubber gaskets around the inner rim to create a more airtight seal. Additionally, some models of both diaper bins and regular bins include built-in compartments for carbon filters or baking soda sachets. While these optional features can help absorb moisture and neutralize volatile organic compounds, they are not permanent solutions and must be replaced regularly according to the manufacturer’s instructions to remain effective.
Liner Requirements and Bag Costs
The type of bag or liner you use plays a massive role in containing odors at the molecular level. Many dedicated diaper bins require proprietary refill cassettes. These cassettes contain a continuous, multi-layer plastic film that is chemically engineered to be less porous than standard household plastics, thereby blocking odor molecules from escaping through the bag itself. As you fill the bin, you pull the film down, and when it is full, you cut and tie off the top. This system is highly effective but ties you to a specific brand’s refill ecosystem.
Regular bins, on the other hand, utilize standard, easily sourced trash bags. While standard bags are highly convenient and cost-effective, they are typically thinner and more porous than specialized diaper liners. This means that even if the bin’s lid is airtight, odors can slowly permeate through the plastic bag over several days. To mitigate this, caregivers using regular bins must rely on manual bagging techniques, such as wrapping each wet or soiled diaper tightly in a small, individual bag before placing it in the main bin. When selecting bags for either system, always check the manufacturer’s specifications for compatible bag thickness and recommended tie-off methods to prevent accidental leaks and odor escape.
Comparing the Daily User Experience
While odor control is the primary concern, the practical, day-to-day usability of the bin will significantly impact your satisfaction. A bin that is difficult to operate while holding a squirming baby, or one that requires constant, tedious maintenance, can quickly become a source of daily frustration in the nursery.
Convenience and Capacity
During a diaper change, safety is paramount, and you must always keep at least one hand on your baby. Therefore, the ease of operating the bin one-handed or completely hands-free is a major consideration. Many dedicated diaper bins feature foot pedals or highly responsive one-touch buttons that allow you to dispose of waste without losing focus on your child. Regular bins also offer foot-pedal options, but cheaper models may slide across the floor or have lids that slam shut loudly, potentially startling a sleeping infant.
Capacity is another critical factor that dictates your daily workflow. A larger bin can hold more diapers, reducing the number of trips you have to make to your home’s main waste chute or outdoor trash bin. However, keeping a large volume of soiled diapers inside a warm room for an extended period is a recipe for severe odor buildup, regardless of how advanced the bin’s seals are. For newborns, who can easily go through 10 to 12 diaper changes a day, a medium-capacity bin that holds about 30 diapers is often the sweet spot. This capacity forces you to empty the bin every two to three days, preventing waste from sitting long enough to create unmanageable smells. Before purchasing, measure your nursery layout to ensure the bin fits comfortably next to your changing table without blocking walkways or doors.
Cleaning and Maintenance
Over time, even the most advanced diaper bins can begin to absorb odors, particularly if they are made of plastic, which is naturally porous. To keep your bin hygienic and smelling fresh, you must establish a regular cleaning routine. Start by checking the manufacturer’s cleaning instructions to verify if the inner bucket or specific mechanical parts are removable and washable.
When cleaning, avoid using harsh chemical solvents, bleach, or highly abrasive scrubbers. These substances can degrade rubber gaskets, weaken plastic seals, scratch the inner surfaces (creating microscopic pockets where bacteria can multiply), and potentially void your product warranty. Instead, wash the interior and exterior of the bin with mild dish soap and warm water. After washing, it is crucial to let the bin dry completely in a well-ventilated area—ideally in direct sunlight—before inserting a new liner. Sunlight acts as a natural deodorizer and helps eliminate any lingering moisture that could encourage mold or bacterial growth. Always ensure the bin is placed out of reach of toddlers who are learning to stand, as heavy lids or tipping hazards can pose physical risks.
Cost Analysis: Upfront Investment vs Long-Term Expenses
When deciding between these two options, it is important to look at the total cost of ownership over your child’s diapering years, which typically last between two and three years. The financial commitment consists of two parts: the initial upfront cost of the bin itself and the recurring cost of the bags or liners.
Dedicated diaper bins generally require a higher upfront investment. In local retail stores and online marketplaces, a specialized diaper bin can cost anywhere from S$40 to over S$100, depending on the complexity of its sealing mechanism and the materials used. In contrast, a high-quality, durable regular bin with a tight-fitting lid can easily be purchased for S$15 to S$40.
The true divergence in cost, however, comes from the ongoing expense of liners. Proprietary refill cassettes for diaper bins typically cost between S$10 and S$20 per pack. Depending on your baby’s age and how often you empty the bin, a single pack may only last two to three weeks. Over a three-year period, this can translate to an ongoing expense of S$200 to S$500 or more just for specialized plastic liners. Regular bins utilize standard trash bags, which can be purchased in bulk at local supermarkets for a fraction of the price, resulting in negligible ongoing costs. Before committing to a specific diaper bin model, always check the current retail prices and long-term availability of its refill cassettes to ensure they fit comfortably within your family’s budget.
How to Decide: Choose a Diaper Bin or a Regular Bin?
To make the final decision, evaluate your household’s specific living conditions, budget, and daily habits against the strengths and limitations of each system.
Choose a dedicated diaper bin if you prioritize maximum odor isolation within the nursery, prefer a seamless, hands-free disposal workflow, and are comfortable with the higher ongoing cost of proprietary refill cassettes. This option is particularly beneficial if your nursery has limited natural ventilation, if you live in a high-rise apartment where daily trips to the main waste chute are inconvenient, or if you simply want the peace of mind that comes with specialized, multi-layer odor barriers.
Choose a regular bin with a lid if you want to minimize both your upfront and long-term expenses, prefer the simplicity of using standard, widely available trash bags, and are fully committed to a disciplined daily routine. A regular bin can work exceptionally well if you make it a habit to wrap soiled diapers individually and empty the bin into your main household trash every single day.
Verify first if your nursery environment is prone to high humidity or poor airflow, as these factors will amplify any lingering smells. If you are undecided, a practical approach is to start by using a high-quality regular bin with a tight lid and establishing a strict daily emptying routine. If you find that odor remains a persistent issue despite your best efforts, you can then confidently invest in a specialized diaper bin, knowing that your specific environment requires the extra mechanical sealing power.
Frequently Asked Questions (FAQ)
Can I use regular trash bags in a dedicated diaper bin?
Whether you can use standard trash bags in a dedicated diaper bin depends entirely on the specific model’s design. Some diaper bins are engineered with versatile clamping systems or adapter rings that allow parents to use any standard trash bag once the initial starter cassette runs out. Other models, however, rely strictly on the continuous tension and shape of proprietary cassettes to maintain their airtight seal. Before attempting to use standard bags, consult the manufacturer’s manual. Using incompatible bags in a proprietary system can compromise the sealing mechanism, allow odors to escape into your nursery, or even void the product’s warranty.
How often should I empty the diaper bin to prevent smells?
The ideal frequency for emptying your diaper bin depends on several factors, including the bin’s capacity, your baby’s diet, and the ambient room temperature. For newborns on an all-milk diet, odors are generally milder, but the sheer volume of diapers may require emptying every two to three days. Once your baby transitions to solid foods, diaper odors become significantly stronger and more persistent. In warm and humid climates, it is highly recommended to empty the bin at least every two days, or even daily, regardless of whether the bin has reached its physical capacity. Establishing a regular schedule prevents gases from building up and permeating the bin’s plastic walls.
Community discussion
Share your experience or ask a question. Comments are reviewed before publication.