
Choosing the right baby ear cleaner for your child is determined entirely by their age, physical mobility, and the type of earwax they produce. For newborns and young infants, the safest and most effective cleaning method is not a specialized tool at all, but a simple, damp washcloth used strictly on the outer ear. As your baby grows into a more active toddler, specialized tools like physical-stopper swabs or illuminated silicone extractors may become options, but only under strict safety conditions. Because an infant’s ear canal is exceptionally delicate and still developing, safety must always dictate your selection. Before introducing any specialized ear cleaning tool into your grooming kit, it is highly recommended to consult your pediatrician to ensure the method is suitable for your child’s specific developmental stage.
Ear Anatomy Basics and Safety Boundaries for Infants
To understand why choosing the right tool is so critical, you must first understand the unique anatomy of an infant’s ear. A baby’s ear canal is incredibly short, narrow, and straight compared to an adult’s. The tympanic membrane, commonly known as the eardrum, sits just a short distance from the entrance of the canal. This thin, highly sensitive membrane is responsible for transmitting sound waves, and even the slightest direct contact from a foreign object can cause severe pain, bruising, or permanent physical damage. Because the skin lining the canal is also exceptionally thin and fragile, any friction from rigid tools can easily cause micro-tears, leading to painful localized infections.
This anatomical reality establishes a strict, non-negotiable boundary for home grooming: your cleaning efforts must be confined entirely to the outer ear, also known as the pinna, and the very opening of the ear canal. The internal canal is a self-cleaning mechanism. Microscopic hair-like structures called cilia, combined with the natural outward migration of skin cells, gradually push old earwax and debris out of the canal naturally. Attempting to reach inside the canal with any tool—regardless of how soft or specialized it claims to be—runs a high risk of pushing the wax backward, compacting it against the eardrum, and defeating the body’s natural self-cleaning process.
Products mentioned in this guide
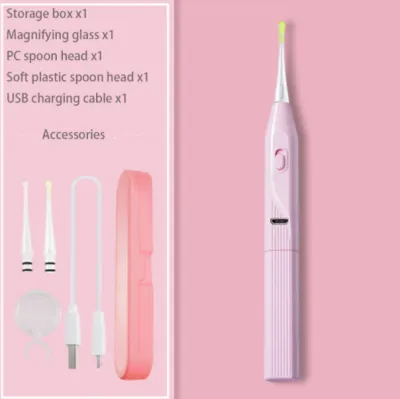


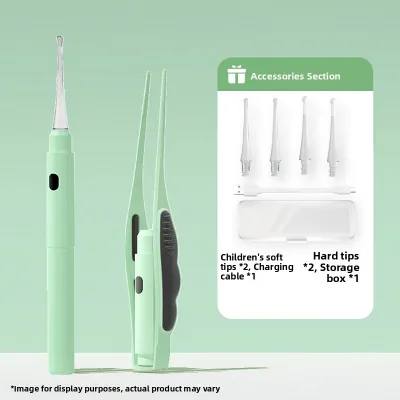
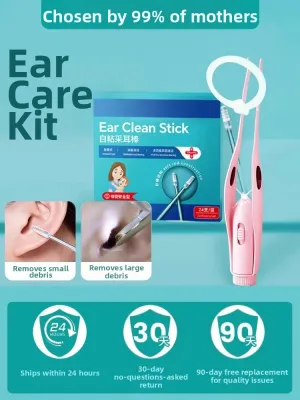
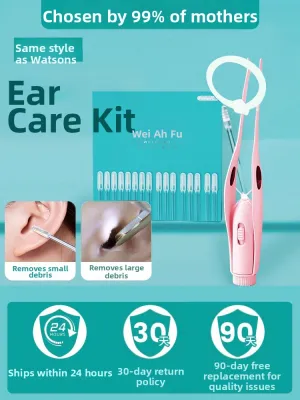


Prices are valid at publication and may change. Please refer to the product page for the latest price.
There are several clinical signs that indicate you should step away from home grooming tools entirely and seek immediate pediatric evaluation. If you notice any unusual discharge, such as yellow, green, or bloody fluid, this could indicate an infection or a perforated eardrum. A foul odor emanating from the ear, persistent scratching or tugging at the ear, unexplained crying, or sudden sensitivity to sound are also clear indicators that a professional examination is required. Additionally, if you can see a dark, hard block of impacted wax deep inside the canal, do not attempt to extract it yourself; a pediatrician has the specialized lighting, magnification, and tools necessary to safely clear the blockage without risking injury.
Evaluating Ear Cleaner Types by Age Group
When browsing baby grooming kits, you will encounter several distinct categories of baby ear cleaners, each designed with different mechanisms. The most common types include manual bulb syringes, spiral silicone swabs, and digital or illuminated extraction tools. While these products often feature appealing marketing claims, it is vital to understand that age recommendations printed on product packaging represent the absolute minimum safety baseline. They do not account for your individual child’s temperament, physical size, or developmental milestones.

To make a safe choice, you must cross-reference any manufacturer guidelines with your baby’s current motor control and level of cooperation. A tool that is technically rated for a six-month-old may be highly dangerous if your specific child is currently going through a highly active, squirmy phase or is prone to sudden, unpredictable head movements. Evaluating these tools requires a realistic assessment of how well you can secure your baby’s head and whether the tool’s design matches their physical size.
Newborns to 6 Months
During the first six months of life, a newborn’s physical vulnerability is at its peak. Infants in this age group have very limited head control, highly unpredictable startle reflexes, and extremely narrow ear canals. For these reasons, the primary and safest routine for newborns is strictly external cleaning. Using a soft, warm, damp washcloth wrapped around your finger to gently wipe the outer ear (the pinna) and the area behind the ear is entirely sufficient for daily hygiene. This method removes dried milk, sweat, and naturally migrated wax without placing any objects near the delicate ear canal.
Some parents consider using manual bulb syringes, which are soft rubber or silicone bulbs designed to suction fluids. The conditional use of bulb syringes in ear care is strictly limited to removing trapped bathwater that may have entered the outer ear canal, and they should never be used to suction dry earwax. If you use a bulb syringe for water removal, you must verify that the tip is extremely soft, clean, and never inserted past the very entrance of the canal. Always follow the manufacturer’s precise instructions for cleaning and sanitizing the bulb, as these enclosed spaces can easily harbor mold and bacteria in humid climates like Singapore’s.
Under no circumstances should you insert rigid, semi-rigid, or mechanical tools into the ear canal of an infant under six months old. Tools such as plastic loops, metal curettes, or digital cameras with extraction tips carry an unacceptably high risk of injury. A sudden, involuntary twitch or startle reflex from a young baby can cause a rigid tip to puncture the eardrum or lacerate the delicate canal lining in a fraction of a second. Keeping the routine simple, external, and non-invasive is the absolute gold standard for this developmental stage.
6 Months to Toddlers
As babies transition into older infants and toddlers, their physical mobility increases dramatically, presenting new challenges for ear grooming. Between six months and toddlerhood, children become highly curious, prone to squirming, and often resistant to being held still for grooming tasks. If you choose to explore specialized ear cleaning tools during this stage, you must carefully evaluate their safety features and your child’s behavior.
Spiral cotton or silicone swabs are popular alternatives to traditional cotton buds, which are notorious for pushing wax deeper. If you are evaluating spiral swabs, check for physical stopper mechanisms—such as a wide, flared collar—that physically prevent the tip from entering the inner ear canal. You must also verify that the product is explicitly rated for your child’s current age group, as tips that are too large can cause discomfort, while tips that are too small may bypass safety guards. Always inspect the material to ensure it is soft and flexible enough to bend if the child makes a sudden movement.
Digital or illuminated ear cleaners, which feature built-in LED lights or micro-cameras that stream video to a smartphone, have become increasingly common in modern grooming kits. While the added visibility can help you see the outer canal clearly, these tools require the child to remain perfectly still during use. The inherent risk of sudden, unpredictable movement remains extremely high; if a toddler jerks their head while a camera tip is inside the ear, serious injury can occur. Therefore, these tools should only be considered if you have a highly cooperative child and can guarantee a completely stable, controlled environment.
Regardless of the safety features a tool claims to possess, you must establish a strict rule: active resistance, squirming, pulling away, or crying is an immediate, non-negotiable signal to stop the cleaning process. Forcing a tool into the ear of a struggling child is one of the most common causes of pediatric ear injuries. If your baby is uncooperative, postpone the cleaning to a later time when they are calm, or rely solely on a damp washcloth to clean the outer ear.
Key Features to Check Before Buying
Before purchasing any baby ear cleaner to add to your home grooming kit, you must perform a thorough safety and quality check. Do not rely on attractive packaging or generic “baby-safe” labels. Instead, systematically evaluate the physical design and material specifications of the product to ensure it meets rigorous safety standards.
First, examine the material softness and flexibility of the cleaning tips. Any part of the tool that comes into contact with your baby’s ear must be made of high-quality, medical-grade silicone or an equivalently soft, flexible elastomer. Avoid any products that feature hard plastic, metal, or rigid wooden components near the tip. The tip should bend easily under light pressure, ensuring that if your baby moves unexpectedly, the material will yield rather than apply force to the delicate ear tissues.
Second, look for a robust depth-limiting design. A safe baby ear cleaner must feature a physical barrier, such as a wide safety guard, a flared base, or an integrated stopper. This guard acts as a physical shield that prevents the tip from being inserted deep into the ear canal, even if you accidentally apply too much forward pressure. If a tool lacks a clear, physical mechanism to limit insertion depth, it is not suitable for home use on an infant or toddler.
Third, verify the manufacturer’s explicit age and weight labels on the packaging. Cross-reference these guidelines with your baby’s current developmental milestones rather than their chronological age alone. If your baby is small for their age or has particularly narrow ear canals, a tool rated for their age group may still be too large or uncomfortable. Always err on the side of caution and choose tools designed for younger or smaller infants if you have any doubts about fit.
Finally, prioritize hygiene and maintenance features to prevent bacterial contamination. Because ears are warm, moist environments, any tool used for ear care can easily become a breeding ground for harmful bacteria or fungi. Ensure the tool can be easily disassembled for thorough cleaning. Look for models that are dishwasher-safe, compatible with steam sterilization, or utilize single-use, replaceable hygienic tips. Avoid tools with complex, hard-to-reach crevices that cannot be easily sanitized.
Executing a Safe Cleaning Routine and Recognizing Stop Signals
When you determine that it is appropriate to clean your baby’s outer ears, executing the routine with precision and care is essential to preventing accidents. Begin by preparing a calm, distraction-free environment. Ensure you have excellent, direct lighting—such as a bright overhead light or a focused lamp—so you can clearly see every contour of your baby’s outer ear. Choose a time when your baby is well-rested, fed, and naturally relaxed, avoiding times when they are overtired or fussy. Secure your baby in a comfortable, stable position, such as cradled in your lap or lying flat on a secure changing mat, ensuring you have a firm but gentle grip to stabilize their head.
During the execution of the cleaning, limit your actions strictly to the visible outer ear and the very entrance of the canal. Use a damp, warm washcloth or the approved baby-safe tool to gently wipe away loose wax, dirt, or moisture from the pinna and behind the ear. Never engage in blind probing; if you cannot clearly see what you are touching, do not proceed. Avoid applying inward pressure, as this can compact wax. Instead, use gentle, outward sweeping motions to coax debris away from the canal opening.
You must remain highly sensitive to your baby’s physical and emotional cues throughout the process. Immediately cease the cleaning routine if your baby startles, cries, whimpers, turns their head sharply, or if you feel any physical resistance from the tool itself. These are clear stop signals indicating that the process is causing discomfort or that the risk of injury has become too high. Never attempt to override your baby’s resistance or force them to comply.
Once the cleaning is complete, perform a quick post-cleaning inspection. Monitor the outer ear for any signs of redness, swelling, or irritation that might indicate the method was too harsh or that the material caused an allergic reaction. Thoroughly clean and sanitize the tools according to the manufacturer’s instructions, and store them in a clean, dry, dust-free container. Always keep all grooming tools completely out of reach of children to prevent accidental self-insertion or swallowing of small parts.
Frequently Asked Questions (FAQ)
How often should I clean my baby's ears?
Earwax, or cerumen, is not a sign of poor hygiene; rather, it is a vital, natural substance that plays a protective, lubricating, and self-cleaning role in your baby’s ears. It traps dust, dirt, and microscopic debris, preventing them from reaching the delicate eardrum, while its natural acidity helps inhibit bacterial growth. Because the ear canal is self-cleaning, active cleaning should be limited to wiping visible dirt and wax from the outer ear during regular baths, which typically only needs to be done once or twice a week. If you observe an unusual buildup of wax, suspect a blockage, or have concerns about your baby’s hearing, do not increase the frequency of home cleaning. Instead, consult your pediatrician for personalized advice and a professional assessment.
Is it safe to use ear drops or liquids for babies?
You should never use over-the-counter adult ear drops, hydrogen peroxide, rubbing alcohol, or homemade liquid remedies in your baby’s ears without explicit medical approval. An infant’s ear canal and eardrum are highly sensitive, and unapproved liquids can cause severe irritation, chemical burns, or intense pain. Furthermore, if your baby has an undiagnosed perforated eardrum or a tympanostomy tube (ear tube) in place, introducing liquids into the ear can lead to severe middle ear infections or hearing damage. Liquid softeners or prescribed ear drops should only be administered under the direct guidance of a pediatrician who has examined your baby’s ears and confirmed that the eardrum is fully intact and healthy.
Community discussion
Share your experience or ask a question. Comments are reviewed before publication.