
Selecting the right rubber edge trim is one of the most practical steps you can take to prepare your home for an active, growing child. As infants transition from quiet observers to active explorers, the sharp corners of coffee tables, TV consoles, and low shelving units present sudden hazards. In Singapore’s urban living spaces, where compact layouts and custom built-in carpentry are common, protecting your child from sharp edges requires a reliable barrier that can withstand daily wear and tear.
While baby-proofing products are widely available, choosing the correct material and installation method is essential for long-term safety. High-density rubber edge trims provide the necessary impact absorption to cushion falls, helping to prevent serious bumps and lacerations. However, these safety tools are designed to supplement, rather than replace, active adult supervision. Understanding how to evaluate, install, and maintain these protective guards ensures your home remains a secure environment for your child’s developmental milestones.
Why Rubber Edge Trim Matters for Baby-Proofing
Between the ages of 6 and 18 months, babies undergo rapid motor development. They progress from crawling on hands and knees to pulling themselves up on furniture, and eventually to taking their first tentative steps. During these stages, a child’s center of gravity is constantly shifting, and their coordination is still developing. Because their heads are disproportionately heavy compared to their bodies, falls often result in head-first impacts. Low-lying furniture edges, such as dining table borders and low-profile TV consoles, sit exactly at the head height of a crawling or toddling child.
Products mentioned in this guide
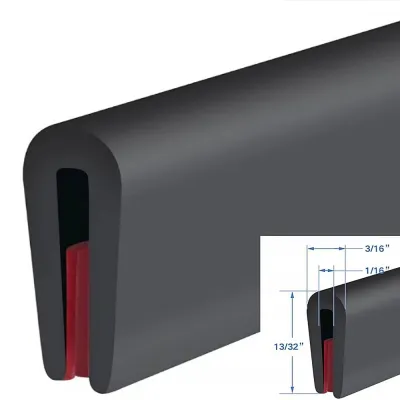
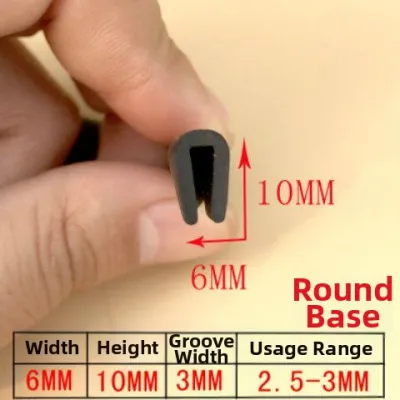
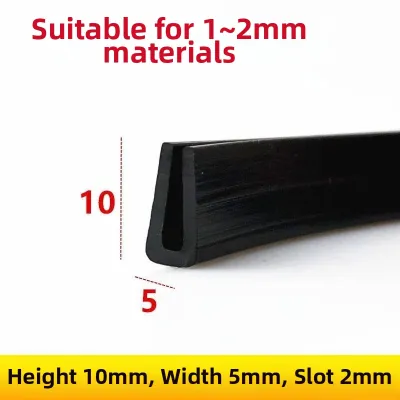
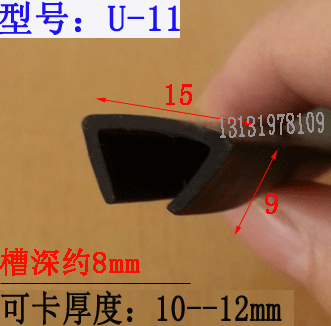
Prices are valid at publication and may change. Please refer to the product page for the latest price.
When an impact occurs, the material covering the sharp edge determines the severity of the injury. Rigid plastics and untreated wood do not compress, meaning they transfer the full force of the collision back onto the child’s delicate skin and skull. High-density rubber and foam-rubber hybrids, such as Nitrile Butadiene Rubber (NBR), are engineered with closed-cell structures. This microscopic design allows the material to compress under sudden pressure, absorbing and dispersing the kinetic energy of the impact, which significantly reduces the peak force of a collision.
It is important to remember that baby-proofing products are secondary safety measures. No physical barrier can eliminate all risks of injury, and edge guards are not a substitute for close parental oversight. Instead, they serve as a crucial line of defense, reducing the severity of accidental bumps while your child learns to navigate their physical environment. Combining these physical guards with structured play zones and constant supervision provides the safest possible environment for your growing toddler.
What to Look for When Choosing Rubber Edge Guards
Material Safety and Non-Toxic Formulations
Because infants explore their surroundings using their hands and mouths, any material affixed to your furniture must be completely safe for oral contact. Teething babies frequently chew on soft edge guards, making material composition a primary safety concern. When shopping for a rubber edge trim, prioritize products that are explicitly labeled as non-toxic, BPA-free, lead-free, and phthalate-free. Parents should look for verified compliance with international safety standards, such as the European EN 71-3 toy safety standard or RoHS certification, to ensure the materials do not contain harmful chemical plasticizers or heavy metals.

Thickness and Density Balance
An effective edge guard must balance thickness with physical density. While a very thick, pillowy foam might look highly protective, low-density foam can easily bottom out under a heavy impact, allowing the underlying sharp corner to cause injury. Conversely, a material that is too dense will feel rock-hard and fail to cushion a fall. Look for high-density, closed-cell rubber trims that offer a firm, springy resistance when squeezed between your thumb and forefinger. This density also makes the trim more resilient against teething babies who might try to bite or tear off chunks of the material.
Adhesive Quality in Humid Climates
Singapore’s tropical climate, characterized by high humidity and warm temperatures, presents a unique challenge for adhesive bonds. Standard double-sided tapes often degrade, slide, or peel away when exposed to consistent indoor humidity, especially in non-air-conditioned rooms. To prevent your baby-proofing guards from peeling off, select trims that utilize high-quality, acrylic-based adhesives, such as heavy-duty 3M double-sided tape. The adhesive must form a strong, semi-permanent bond with the furniture surface while remaining removable when the child outgrows the need for edge protection.
Color and Aesthetic Integration
Baby-proofing does not require you to completely compromise your home’s interior design. Edge trims are available in a variety of styles, from opaque, wood-toned NBR foam strips to completely transparent silicone guards. Opaque guards are highly visible, which can help parents avoid stubbing their toes, but they may also attract a curious baby’s attention, prompting them to pull at the trim. Transparent silicone and thermoplastic polyurethane (TPU) options blend seamlessly with glass, metal, and modern minimalist decor, making them less noticeable to both guests and curious children.
Recommended Rubber Edge Trim Categories for Your Home
The ideal protective guard depends on the specific furniture pieces in your home, the sharpness of their edges, and your child’s developmental stage. Different surfaces require tailored solutions to ensure both maximum protection and long-term durability.
Dense Rubber Strips for Sharp Table Edges and Desks
For sharp, straight edges on dining tables, study desks, and wooden shelving, dense rubber strips (often made of NBR) are highly effective. These strips typically feature an L-shaped profile that hugs the top and side of the furniture edge, providing comprehensive coverage.
- Best for: Wooden dining tables, laminate desks, and sharp-edged shelving units.
- Why it works: The high-density rubber offers excellent shock absorption without adding excessive bulk to your daily-use furniture.
- What to check: Ensure the strip's inner width matches the thickness of your table edge. The adhesive tape should cover the entire inner surface of the trim to prevent the edges from curling up over time.
Thick Foam Bumpers for Low Consoles and Hearths
Low-profile furniture, such as TV consoles, coffee tables, and wide structural ledges, requires heavy-duty protection. Because toddlers often fall onto these low surfaces from a standing position, the impact force can be significantly higher, demanding a thicker protective barrier.
- Best for: Low TV consoles, heavy wooden coffee tables, and stone or tiled floor ledges.
- Why it works: The extra thickness of these foam-rubber hybrids provides deep compression, absorbing high-velocity impacts from trips and slips.
- What to check: Verify that the outer layer of the foam is tear-resistant. Cheap, low-density foam can be easily picked apart or chewed on by curious toddlers, creating a potential choking hazard.
Clear Silicone or Rubber Guards for Glass and Modern Decor
Glass coffee tables and modern acrylic furniture present a unique aesthetic and functional challenge. Opaque foam guards can look out of place on these materials, whereas transparent guards offer a clean, unobtrusive alternative.
- Best for: Glass-top tables, metal-framed furniture, and minimalist home setups.
- Why it works: Clear silicone or soft PVC guards protect against sharp corners while preserving the visual appeal of your furniture.
- What to check: Confirm that the clear material is UV-stabilized to prevent it from yellowing over time when exposed to sunlight near windows. Additionally, ensure the included adhesive is clear and formulated specifically for glass or metal surfaces.
Step-by-Step Installation and Safe Removal Guide
Proper installation is critical to ensuring your rubber edge trim remains securely in place. Even the highest-quality adhesive will fail if the surface is not prepared correctly before application.
Step 1: Surface Preparation
Before applying any adhesive, you must clean the furniture surface thoroughly. Dust, skin oils, and household polish residues will prevent the tape from forming a secure bond. Wipe the target area with rubbing alcohol (isopropyl alcohol) and a clean, lint-free cloth. Avoid using multi-purpose household sprays, as they often leave behind a slick residue that compromises the adhesive. Allow the surface to dry completely before proceeding.
Step 2: Measuring and Cutting
Measure the length of the furniture edge carefully. Lay the rubber edge trim flat and mark the required length. Use a pair of sharp kitchen shears or a utility knife to make a clean, straight cut. If you are wrapping the trim around a 90-degree corner, you can use pre-molded corner guards, or cut a 45-degree miter joint into the strip to create a neat, seamless corner.
Step 3: Applying the Adhesive
Apply the double-sided adhesive tape to the inner surfaces of the rubber trim first, pressing down firmly along the entire length to remove any air bubbles. Once the tape is secured to the trim, peel off the protective backing paper. Align the trim carefully with the furniture edge, starting from one end and working your way to the other.
Step 4: Securing and Curing
Once the trim is in place, apply firm, even pressure along the entire length of the guard for at least 60 seconds. Pay special attention to the ends and corners, as these are the areas most prone to peeling. For the best results, allow the adhesive to cure undisturbed for 24 hours before allowing your child near the furniture or attempting to test the bond.
Step 5: Safe Removal Process
When your child outgrows the need for edge guards, removing them improperly can damage wood veneers, paint, or lacquer finishes. To remove the trim safely, use a hairdryer on a low-to-medium heat setting to warm the adhesive. Wave the dryer back and forth along a small section to soften the glue, then slowly peel the rubber trim away at a shallow angle. If any sticky residue remains on the furniture, apply a small amount of baby oil, olive oil, or a specialized adhesive remover to a cloth and gently rub the area clean. Always test any oil or adhesive remover on an inconspicuous, hidden area of the furniture first to ensure it does not damage the finish.
Crucial Safety Checks and Maintenance Tips
Installing baby-proofing guards is not a one-time task; regular maintenance is required to ensure they remain safe and functional over time.
- Choking Hazard Inspections: Inspect all installed edge trims at least once a week. Look closely for any signs of peeling, bite marks, tears, or missing chunks. If a section of the rubber is damaged or loose, remove and replace it immediately to prevent your child from pulling it off and choking on the pieces.
- Adhesive Longevity Checks: Singapore's high indoor humidity can slowly degrade adhesive bonds over several months. Perform a gentle "tug test" on the ends of the guards during your weekly cleaning routine. If the trim slides or lifts easily, peel it off, clean the surface, and reapply it using fresh, high-quality double-sided tape.
- Furniture Finish Compatibility: Before applying adhesive to high-value items, such as antique wooden furniture, oil-finished surfaces, or delicate wallpapers, consult the furniture manufacturer's care instructions. Some strong adhesives can react with wood oils or strip away delicate finishes upon removal. If you are unsure about compatibility, consider using free-standing playpens or fabric barriers to block access to those specific furniture pieces instead.
Frequently Asked Questions (FAQ)
Are rubber edge guards safe if my baby chews on them?
While high-quality rubber edge guards are manufactured using non-toxic, BPA-free, and lead-free materials, they are not designed or certified as teething toys. If your baby is actively teething, they can tear off small pieces of soft foam or rubber, which presents a serious choking hazard. Always supervise your child closely, inspect the guards daily for bite marks, and provide dedicated, food-grade silicone teething toys to satisfy their urge to chew.
How do I remove sticky residue from wood furniture after taking off edge guards?
To remove stubborn adhesive residue without stripping the wood’s finish, apply a small amount of mild household oil, such as baby oil or olive oil, to the sticky area and let it sit for a few minutes to break down the adhesive. Gently wipe the residue away with a soft microfiber cloth. For persistent adhesive, a commercial residue remover can be used, but you must test it on a hidden, inconspicuous area of the furniture first to ensure it does not discolor or damage the varnish.

Community discussion
Share your experience or ask a question. Comments are reviewed before publication.